Chicken Vada Pav

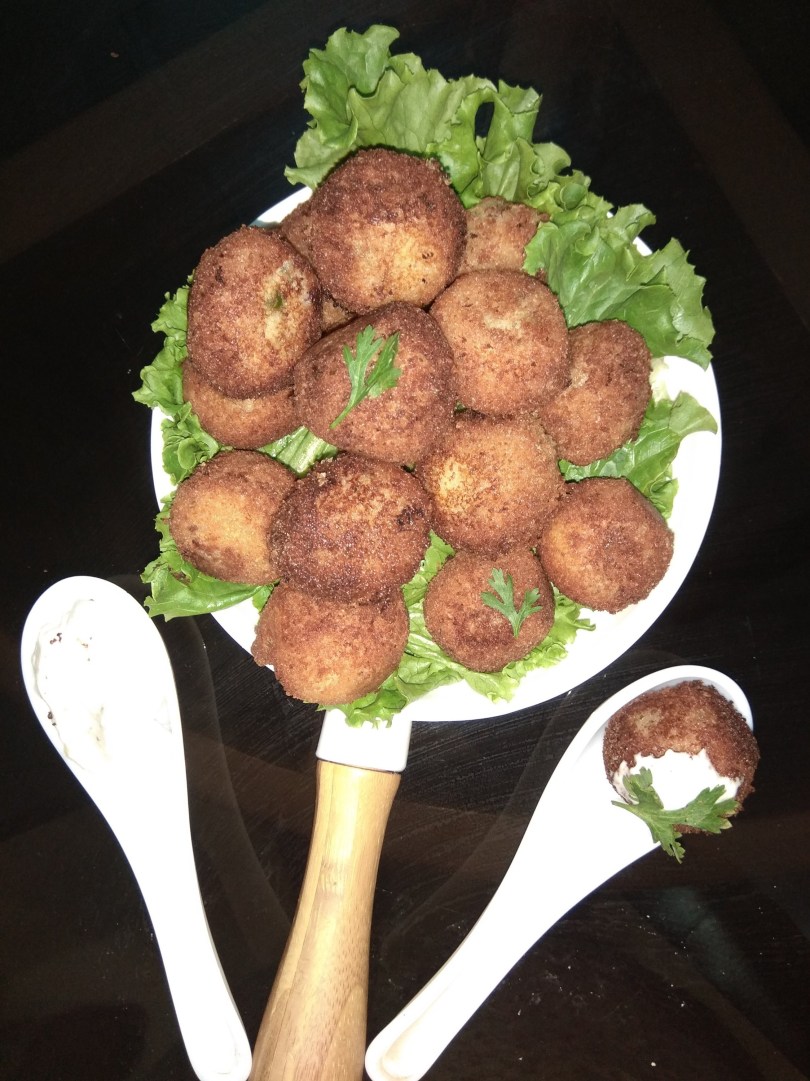
Mumbai and it’s passion and love affair with vada pav is well known. This mouth watering snack enjoys immense popularity among the Mumbaikars and my boys are no different and especially the younger one. Recently on his visit to a food joint, he came across the non vegetarian version of this iconic snack called ” chicken vada pav”. Mesmerised by its aroma and flavor, he motivated me to give a try to this unique dish. Chicken keema cooked with regular spices and herbs, stuffed in the potato mix, dipped in gram flour batter and deep fried to perfection and finally sandwiched between the pav — an iconic dish with an iconic twist.Believe me, the explosion of flavours is worth all the hard work.

Ingredients 

For keema

Chicken mince : 200 gms

 Onion : 1

Ginger garlic paste : 1 tsp

Corriander powder : 2 tsp

Red chilli powder : 1 tsp

Turmeric powder : 1 tsp

Cinnamon stick : 1

Black cardamom : 1 

Green cardamom : 1

Lemon juice : 1 tsp

Salt as per taste

Green peas : 2 tsp

For potato mix

Potato : 4 boiled and mashed

Green chili : 4 to 6

Garlic : 6 to 7 pod

Turmeric powder : ½ tsp

Mustard seed : ½ tsp

Curry leaves

Salt

For the batter

Besan : 6 spoon

Ajwain : ½ tsp

Red chilli powder : 1 tsp

Salt as per taste

Oil for frying

Step 1

Take two tsp oil in a pan and add cinnamon, cardamom and cumin seed and let it splutter. Add the chopped onion and fry until golden brown.

Step 2

Add the ginger garlic paste, coriander powder, red chilli powder and salt and saute until the masalas are cooked. Next add the chicken mince and give them all a good mix. Put the peas and saute them all together.cover it with a lid and let it cook for ten to fifteen minutes until the keema is done stirring regularly.

Step 3

Sprinkle coriander leaves and add the lemon juice. Keep it aside and let it cool.

Step 4

In the meantime make a lump free and smooth thick batter with besan, salt, chilli powder and turmeric and water. Let it rest for sometime.

Step 5

In a pan heat 1 tsp oil and fry the green chillies and garlic. Once cool coursley grind it. 

Step 6

In the same pan add two tsp oil and add the mustard seeds and curry leaves and let it splutter and release the aroma. Next add the boiled and mashed potatoes along with turmeric and red chilli powder and salt and stir fry them until done. Let it cool.

Step 7

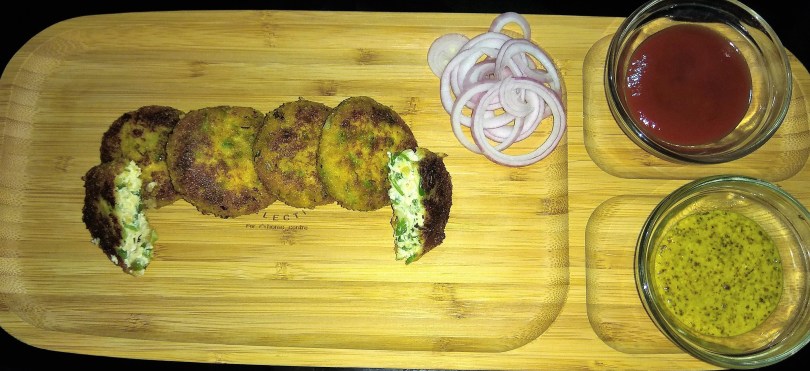
Grease your palm and make a ball with the potato mix and fill in two tsp keema in the centre and give it a shape like a round shaped vada.

Step 8

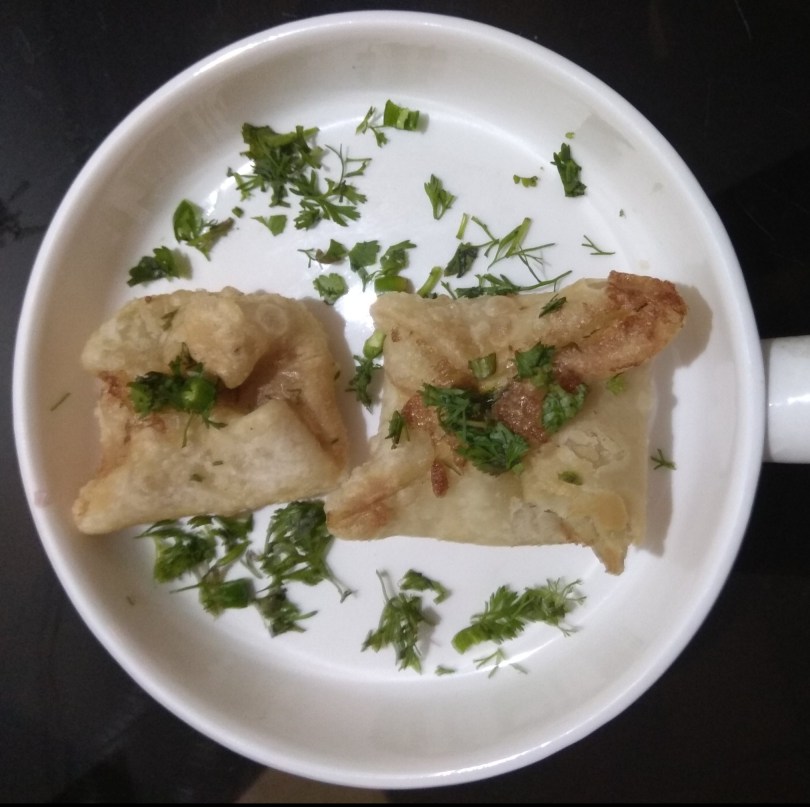
Dip the vada in the besan batter and deep fry and enjoy with pav and chutney.

Tip

One may use the soya keema for the veg version.


Keema goli ( mutton ball)

Keema goli or mutton ball is yet another favourite recipe from our growing up years. As kids we loved this recipe since it was easy to munch and full of flavours. The delicious and crunchy mutton Keema goli is a must try dish for meat lovers. It is indeed a great combination of incredible spices along with mutton cooked to perfection. Though it does not enjoy popularity like Shammi kebab or gelauti kebab but it is a great recipe to indulge as a snack or even for the main course along with the main spread.

Ingredients

Mutton mince : 250 grams

Chana dal : 2 tsp (washed and soaked for at least half an hour)

Onion : 1 small

Ginger : 1 inch

Garlic : 4 to 6 pod

Whole red chilli : 4 to 5

Corriander seed : 1 tsp

Cumin : ½ tsp

Black cardamom : 2

Green cardamom : 2

Pepper corn : 6

Cinnamon stick : 1

Raisin : 8 to 10

Bread crumbs : 2 tsp

Salt : as per taste

Oil for frying

Step 1

Wash the mutton Keema thoroughly.

Step 2

In a pressure cooker put the Keema long with sliced onion, Ginger, garlic, corriander seed, cumin, clove, pepper corn,cardamom, cinnamon stick,salt and half a cup of water 

Step 3

Cook it for 3 to 4 whistle. Once the pressure is released, check the excess water and in case it’s there cook it on a high flame until the  water completely evaporates.

Step 4

Let it come down to the room temperature .

Step 5

Grind it in a mixie with one tsp oil. Add two tsp of bread crumbs to the keema mixture.

Make small Keema balls and stuff a raisin in the centre.

Step 6

Deep fry the goli until golden brown. Serve it with chutney of your choice .

Tip

The raisin in the centre helps the goli to remain soft inside and also gives a sweet flavour to it.


Egg Puff

This delightful and fluffy egg puff works well for breakfast or tea time snacks. It has been our childhood favorite recipe that I enjoyed with my cousins together in our majestic dining table along with fun-filled conversations, laughter and fond memories. Food and family memories are very often co related that makes the culinary journey even more memorable.

Traditionally egg puffs are made using boiled eggs but here I have used beaten egg whites since this is the way we have been enjoying it and I hope my readers also does the same.

Ingredients

Egg : 4 whites (beaten)

Onion : 1

Green chillies : 2 to 3

Coriander leaves : 3 tsp

Salt : as required

Oil : for frying

For puff pastry

Maida : 200 gms

Oil : 4 tsp

Salt : 1 tsp

Kalonji: 1/4 tsp

Water : as required

Step 1
wp-15806274929271276930920.jpg
Knead a soft dough with oil, salt and water. Cover it with a moist cloth and let it rest for at least half an hour 

Step 2
wp-15806274918941521772950.jpg
Separate the egg white from the yolk and beat the white until it’s fluffy.

Step 3
wp-1580627490782535045975.jpg
Mix it with thinly diced onion, green chillies, corriander leaves and salt.

Step 4
wp-15806274897431782122660.jpg
Take a small ball from the dough and roll it into a circle.

Step 5
wp-15806274886822047546756.jpg
Brush the edge with water. Place a scoop of egg mixture on the sheet.

Step 6
wp-1580627487666462545796.jpg
Bring together the diagonally opposite sides and seal it.

Step 7
wp-1580627486653836324596.jpg
Heat oil in a pan. Gently place the puff in the medium hot oil and let it fry til the outer crust becomes crispy.

Step 8
wp-1580627484585690028078.jpg
Serve it hot.

Tip

Sprinkle the salt at the end since salt would make the egg runny and filling them would become a problem.


Prawn Tikka

A few days back while cleaning my cupboard, l  came across an old cookery book lying unnoticed in the shelf. As I started to turn its pages,    I chance upon few breathtaking kebab recipes and prawn tikka instantly caught my attention and decided to give a try. It turned out to be of intense flavour and unparalleled taste. And so here I am with the recipe since I strongly believe that the only way to treat these hidden treasure is to pass it on and circulate to increase its value. The taste and aroma of prawn tikka will definitely knock you off your feet. I have retained the tail of the prawns to make it crunchy from outside and juicy inside.

Ingredients:

Prawns : 1 kg de-veined

First marinade

Lime juice : 2 tsp

Salt : 1 tsp

Second marinade

Hung curd : 1 cup

Garlic paste : 3 tsp

Ginger paste : 4 tsp

Pepper : 1 tsp

Ajwain : 1 tsp

Cream : 6 tsp

Grated cheese : 6 tsp

Garam masala powder : 1 tsp

Besan : 4 tsp ( dry roasted)

Salt : As required

Butter: For brushing

Step 1

img_20191214_093737-12117428033.jpgMarinate the prawns with salt and lemon juice and keep it aside for at least half an hour.

Step 2

img_20191214_1050191795161153.jpgMix the curd with the rest of the ingredients and give it all a good whisk.

Step 3

img_20191214_1054541615445029.jpgSqueeze the extra moisture from the marinated prawns. Now mix it with the second marinade and let it rest for at least an hour.

Step 4

img_20191214_1321001538611277.jpgPierce the prawn through thin bamboo skewers .

Step 5

img_20191214_1322221818605990.jpgPlace the skewers in the griddle pan at a medium heat for about ten minutes brushing wit the rest of the marinade and melted butter.

Step 6

img_20191214_1335382070806466.jpgOnce done serve it with salad of your choice.

Tip

Do not overcook the prawn as it will become tough and chewy.
soak the bamboo skewers in water for at least half an hour before using it.


Matar ki potli

” Unless you try to do something beyond what you have already mastered, you will never grow”.

To me, life is all about evolution and l enjoy each day as a part of the process of learning. On my visit to Delhi for my nephews wedding, I was amazed by scrumptious vegetarian spread. But actually the potli shaped snack was the crowd puller. It not only looked awesome but tasted even better. And with green peas in the season, I thought of trying it out for my family and friends and the end result was so outstanding that here i am with the same recipe. Matar potli is an interesting variation of traditional matar ki kachori. A perfect tea time snack for your loved ones.

Ingredients

For the dough

 Maida : 250 gms

Oil : 3 tsp

Ajwain : ½ tsp

Salt : 1 tspFor

Warm water : to knead as required

 For the filling

Peas : 1 cup

Hing : a pinch

Onion : 1

Grated ginger : 1 tsp

Cummin : 1 tsp

Green chilli : 4 crushed

Coriander powder : 1 tsp

Garam masala powder : 1 tsp

Amchur powder : ½ tsp

Coriander : 2 tsp fresh and chopped

Mozzarella cheese : 75 gms grated

Salt as required

Oil : 2 tsp

Step 1
img_20191127_180406439327452.jpg
Knead a tight dough with maida, ajwain, salt, oil and lukewarm water. Cover and keep it aside for at least 15 to 20 minutes.

Step 2
img_20191127_123524988582131.jpg
Add oil in a pan. Once hot add hing and jeera and let it clutter. Then add onion and let it turn translucent.

Step 3
img_20191127_123755713091458.jpg
Next put ginger and green chilli and give them all a good mix.

Step 4
img_20191127_1240101476051012.jpg
Add green peas along with coriander powder, amchur, garam masala and salt.

Step 5
img_20191127_1242091385001017.jpg
Stir them all together. Reduce the heat and cover the pan and let it cook for seven to eight minutes stirring occasion. In case if the masala sticks to the pan, sprinkle a few drops of water to prevent it from burning.

Step 6
img_20191127_1248391719808505.jpg
Once done take out the peas,garnish it with coriander and let it cool.

Step 7
img_20191127_184158720811267.jpg
Divide the dough into equal sized balls and roll each one of them into small circle. Place a tsp of stuffing in the centre of the circle and top it up with grated cheese. Now slowly bring the edges together and by pinching it’s neck shape it like a potli.

Step 8
img_20191127_1854041627908247.jpg
Heat enough oil in a thick bottom pan and deep fry the potlis on a low flame until they are crispy and done.

Step 9
img_20191127_1914421169318080.jpg
Serve the matar ki potli along with sauce or chutney of your choice 

Tip

One can add potato or paneer mixture with the peas.


Rice flour dumpling ( पिट्ठा )

Pitha (पिट्ठा) is a traditional Bihari delicacy and an integral menu of its cuisine. These steamed dumplings are high in protein and a flavourful guilt free snack. My mom used to serve it as evening snacks and was thoroughly relished by my dearest father. And now I do the same for my husband who equally enjoys it. It is a very humble and rustic dish that would never disappoint you. Bihari dal pita is prepared with rice flour and is stuffed with spicy lentil filling. One just requires to have an artful attention to the details for the perfect outcome.

Ingredients:

Rice flour : 300 gms

Chana dal : 250 gms ( soaked overnight )

Green chilli : 6 to 7

Garlic : 10 to 14

Cummin seed : 1 tsp

Aesfotida : ½ tsp

Turmeric powder : ½ tsp

Salt : as per taste

Step 1:
img_20190521_130331528688700.jpg
Knead the dough by adding the rice flour in about half cup of hot water along with ½ tsp of salt.

Step 2:
img_20190521_1304411633929060.jpg
Mix it with the help of spatula. Cover the lid and keep it aside for few minutes.

Step 3:
img_20190521_1320091649260038.jpg
Knead the dough and cover it.

Step 4:
img_20190521_1236071765360886.jpg
In a mixing  jar put together chana dal, green chilli, garlic, cummin, handi and aesfotida and salt.

Step 5:
img_20190521_1243021609859778.jpg
Grind them together and make a smooth paste.

Step 6:
img_20190521_132530988962710.jpg
Flatten each of the balls carefully and fill the dal mixture.

Step 7:
img_20190523_184046742693453.jpg
Fold it into semicircle shape and place them in a grease steamer and steam it for about ten to fifteen minutes or until the dal filling gets cooked.

Step 8:
img_20190521_135553914033297.jpg
Once done take the Pitha out and let it cool down.

Step 9:
img_20190521_134943483389973.jpg
Slice them evenly and serve with green or red chutney

Tip:
Add extra dry rice flour if there is excess water in the dough.

The secret of good Pittha is the unique combination of spices Along  with the chana dal.

Fish Ball

I have a great fish ball childhood memory . It was indeed a fiesta every time a fish ball was cooked in my mom’s kitchen. And now I cook the same for my children since this is the only form of fish that they relish and enjoy. Fish balls are made with fish boiled in its broth and then deep fried. The only difficult part is removing the bones from the fish. But since the end result is so outstanding that one would definitely forgo the tough part. It is worth every effort you spend making it. Enjoy the fish ball as a snacks or a main course along with tarter sauce or any other chutney of your choice .


Ingredients:

Fish : 500 GM’s( Any fish of your choice)

Onion: 2 chopped

Ginger: 1tsp

Garlic : 1tsp

Green chilli : 6

Coriander : chopped

Garam masala powder :1 Tsp

Lemon juice :1 Tsp

Bread crumb : as required

Maida : 2 tsp

Oil : for frying

Salt : as per taste


For the broth :


Ginger : 1 inch

Garlic :4 to 5 pod

Black cardomom : 1

Pepper corn :8 to 10

Cinnamon stick

Onion :1 roughly sliced

Venigar :1 tsp

Salt : as per taste

Step 1

img_20190228_080732409781023.jpgBoil the fish along with ginger, garlic, black cardamom, pepper corn, onion, salt, venigar and a teaspoon of oil for about 15 minutes.once done let it cool and then debone the fish and mash it.

Step 2

img_20190228_0859241455693405.jpgTake a pan and saute onion, ginger, garlic, green chilli along with salt and lemon juice.

Step 3

img_20190228_09023553300010.jpgOnce done pour it over that fish mash and sprinkle garam masala powder over it.

Step 4

img_20190228_090547953616812.jpgGive them all a nice mix and keep it aside.

Step 5

img_20190228_091142770326697.jpgApply oil in your palam and make balls out of it

Step 6

img_20190228_093426470850511.jpgIn a bowl make a semi thick batter of maida and salt. In a seperate bowl place the bread crumb and keep it aside .

Step 7

img_20190228_0944281301171735.jpgNow dip the balls first in the slurry and then roll in the bread crumbs.

Step 8

img_20190228_201021985178440.jpgPour oil in the pan and deep fry the balls until it turns golden brown and crispy.

Step 9

img_20190228_201923779854681.jpgTake it out and serve with sauce of your choice

Tip

Add a little extra oil while frying the onions as this will keep the fish balls moist.

One can also add pudina leaves to make it even more flavourful.


Potato PinWheel ( Aloo Nimki)

Nimki is a light refreshing nibbles that is highly popular in Bihar. Since the dough is the same as nimki but is stuffed with potato, we call it aloo nimki. Aloo nimki is a new spin to the traditional Indian samosa. In fact when I get bored of making samosas, aloo nimki pops up in the menu as it is perfect for anyone’s taste. It is a mouth-watering snack where the potato stuffing is rolled in a maida dough and shaped like a pinwheel. The kids in particular relish it more because of its crisp texture and interesting shape . It is enjoyed best with red or green chutney.

Ingredients :

For Stuffing

  1. Potato :  5 Nos.
  2. Onion :  1 small thinly diced
  3. Ginger paste:  1 tsp
  4. Coriander powder:  1 tsp
  5. Turmeric powder :  ½ tsp
  6. Red chilli powder:  1 tsp
  7. Garam masala powder:  1 tsp
  8. Aamchur powder:  1 tsp
  9. Oil: For deep frying
  10. Salt: As per taste

For the dough

  1. Maida: 300 GM’s
  2. Oil: 3 tsp
  3. Salt: 1 tsp
  4. Ajwain:  ½ tsp

Step by step instructions with photos

Step 1:

1.potato pinwheel.jpg

Boil potatoes and peel them.


Step 2:

img_20181016_1214531206737279.jpg

Mash them coarsely


Step 3:

img_20181016_1223061056190955.jpg

Add oil into kadai . Once hot put the diced onion and saute it till the color changes. Add Ginger along with the rest of the masala .


Step 4:

img_20181016_122529781399964.jpg

Saute the masala and then add the mashed potatoes.


Step 5:

img_20181016_122741383249986.jpg

Saute it on high flame for couple of minutes till the potatoes and the masala blends together. Switch off the flame and sprinkle chopped coriander leaves over the mixture.


Step 6:

img_20181016_1228501348826948.jpg

Spread the stuffing in a flat dish and let it be cool.


Step 7:

img_20181016_124220179602173.jpg

In a shallow vessel knead  a tight dough along with salt, oil and Ajwain.


Step 8:

img_20181016_1246011079958057.jpg

Cover the dough and let it rest for at least ten minutes.


Step 9:

img_20181016_124832747160180.jpg

Divide the dough into equal size balls. Flat the balls using the rolling pins and make large rotis. Use oil so that that the dough doesn’t stick to the rolling pin.


Step 10:

img_20181016_1251021062497665.jpg

Divide the stuffing into equal parts. Now spread the potato mixture evenly over the roti.


Step 10:

img_20181016_1251541569787698.jpg

Now place the another disc over the stuffing and repeat the process of evenly spreading of the mixture


Step 11:

img_20181016_12540373040247.jpg

Gently roll the disc starting from one end.  


Step 12:

img_20181016_125454413459918.jpg

Once done with rolling keep it aside.


Step 13:

img_20181016_125617477987926.jpg

Take a sharp knife and cut the roll horizontally. 


Step 14:

img_20181016_1258401963378742.jpg

Each slice will be in a shape of a pinwheel.


Step 15:

img_20181016_1303311091311248.jpg

Heat oil in a pan and deep fry the nimki on medium flame turning occasionally .


Serving

img_20181016_1317011449515341.jpg

Take them out in an absorbent paper once it is golden and crisp. Serve it hot with chutney or sauce of your choice

=============

Tip:

Try to prepare the stuffing in advance and allow them to come to the room temperature. This will enable the pinwheel to retain its shape.

Dahi Kebab ( Hung Curd Kebab)

Dahi kebab is a very classic, healthy and protein rich Awadhi recipe that is made from hung curd along with few spices and seasoned with fresh herbs. In-fact when I first heard about dahi kebab, it was unimaginable for me to even think of a kebab made out of curd since it it so difficult to hold it together . But once I came to know the secret behind it I enjoyed making it myself. Curd or dahi is highly popular throughout south Asian countries like Pakistan,Bangladesh and India. But I believe that we Indians have a special love for dahi and we could have it any form. It is indeed an integral part of our culinary culture.
Dahi kebab is one such curd dish which could be served both as an appetizer and main course. It is crispy from outside and creamy and melting from inside with soft and subtle flavour of spices. There are different variations of making dahi kebab. Enjoy my take on this classic recipe.

Ingredients:

  • Curd : 700 gm
  • Ginger :1 Tsp grated
  • Green chilli : 3 finely sliced
  • Capsicum : 1 finely chopped
  • Cheese :100 gm grated
  • Sugar:  1 Tsp
  • Garam masala  powder :1 Tsp
  • Salt : as per taste
  • Bread crumbs:
  • Besan :4 tsp  ( Dry Roast besan in low flame till it becomes golden brown and aromatic)

    Follow the steps for the perfect result:

Step 1: Tie the fresh curd in a muslin cloth

Dahi-kebab_nandini_1


Step2: Hang it overnight so that the water completely drains out.

Dahi-Kebab_Nandini_2


Step 3: Your hung curd with creamy consistency is done

Dahi-Kebab_Nandini_3


Step 4: Mix the curd with green chillies, capsicum, Ginger, sugar, cheese,roasted gram flour, finely chopped coriander leaves, garam masala powder and salt. Be a little cautious while putting salt since cheese already has salt in it.

Dahi-Kebab-Nandini_4


Step 5 : Mix it all together and put it into the fridge till you proceed.

Dahi-Kebab-Nandini_5


Step 6 : Now apply water or oil in your palm and make tikkis out of the curd mixture. Since the texture of the mixture is very soft and creamy, one needs to delicately handle it.

Dahi-Kebab-Nandini_6


Step 7 : Next coat the kebab with the bread crumbs.

Dahi-Kebab-Nandini_7


Step 8 : Heat oil in the pan and shallow fry the kebab one by one on medium flame. Turn over the dahi kebabs once you get a nice golden crust on the top.

Dahi-Kebab-Nandini_8


Step 9  : Your dahi kebab is ready to be served. Enjoy the appetizing dahi kebab with any chutney or sauce of your choice.

Dahi_Kebab-Nandini_10


Tip: Sugar enhances the tangy flavour of dahi kebab with a pinch of sweetness.