Nutrela Kebab (Veg)

My son’s love for kebabs has made me explore a new variety of veg and nonveg kebabs to keep his palate satisfied. Soyabean is one of the best sources of high protein  and this vegetarian and healthy kebab is an interesting way to include it in your child’s diet.  Nutrela soya may sound very regular but believe me its meaty texture elevates the dish to all together in a new dimension. Made with soya granual and chana dal, this veg kebab is not only  easy to cook but tastes amazing too and makes a great starter.

Ingredients

Soya granules : 100 gms

Chana dal : 150 gms (soaked for an hour)

Red chilli : 3 to 4

Bay leaf : 2

Black pepper : 8 to 10

Ginger : 1 inch

Garlic pod : 4 to 5

Coriander seeds  : 1 tsp

Cumin seed : 1 tsp

Clove : 3 to 4

Cinnamon : 1

Green cardamom : 2

Black cardamom : 1

Onion : 1

Green chilli : 2

Lemon juice : 1 tsp

Coriander leaves

Salt according to taste

Oil for frying

Step 1
wp-15907310462021069806560.jpg
Boil the soya granules for about ten minutes. Strain the water and once cool squeeze the excess water and keep it aside.

Step 2
wp-15907310450521217368693.jpg
Boil the soaked chana dal in one and a half cup water along with whole garam masala, ginger, garlic, bay leaf, coriander seed, cumin seed and salt for one whistle and lower the flame and let it cook for another ten minutes or until the dal becomes soft.

Step 3
wp-159073104385074998831.jpg
Once done check the dal and if there is excess water boil it further till it evaporates.

Step 4
wp-15907310426491036920641.jpg
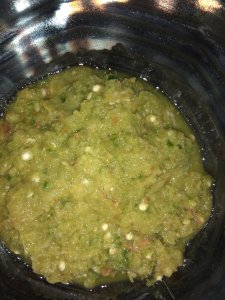
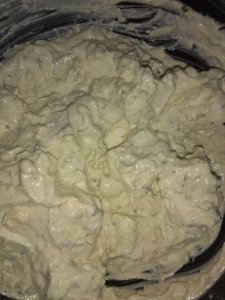
When cool separately grind the boiled soya chunks and the dal mixture. Take the mix in a bowl and add thinly sliced onion, green chili, salt, lemon juice along with two tsp oil as it will prevent the mixture from Getting dry.

Step 5
wp-15907310403022118419225.jpg
Now divide it into equal sized balls and make tikkis out of them. Do not forget to apply oil in your palm to prevent the tikkis from sticking in your hand.

Step 6
wp-1590731038023284768584.jpg
Shallow fry them in a medium hot oil until they are golden brown.

Step 7
wp-15907310368051202878841.jpg
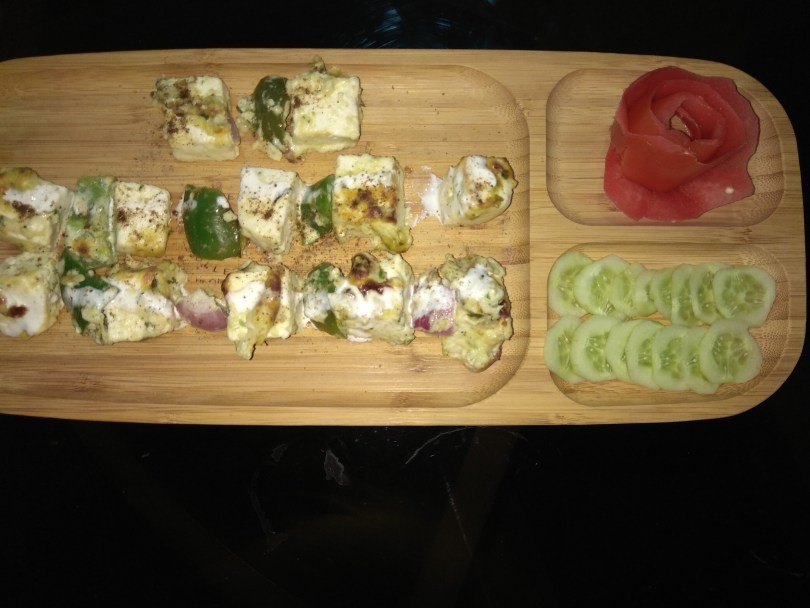
Enjoy the soya kebab with your family and friends.

Tip

In case the kebab mixture is soft and difficult to handle then add two tsp of bread crumbs into it.

Keema Kaleji

Keema kaleji

My mother is  a cookbook of simple yet delicious food. She turned seventy five this April and we had planned a grand birthday party but nothing worked out because of the lockdown due to Covid19. Since, left with no other choice to convey my love and respect towards her, I thought of dedicating  this blog  to my dearest mom who has been a consistent guide in my culinary journey. This is indeed our way to convey it that we are blessed with your presence and influence and pray to the almighty for your well being. This Keema kaleji is cooked by her for the blog. It is a very basic recipe with mutton Keema and liver chunk and few simple masalas that is easily available in any Indian household. You may simply accompany the Keema kaleji with any Indian bread or even plain rice.

Ingredients

Mutton Keema :250 gms

Liver chunk : 250 gms

Onion: 3 to 4

Ginger paste: 2 tsp

Garlic paste:1 tsp

Bay leaf: 3

Green cardamom: 4

Black cardamom: 2

Cinnamon stick: 1

Turmeric powder: 1 tsp

Red chilli powder: 1 tsp

Corriander powder: 2 tsp

Garam masala powder: 1 tsp

Curd: 100 gms

Mustard oil: 4 tsp

Salt : as per taste

Step 1
wp-1589633247290103353446.jpg
Heat oil in a pan and add the whole garam masala along with bay leaf.

Step 2
wp-15896332439951073146185.jpg
Once they crackle add the sliced onions and saute it until they get caramelized.

Step 3
wp-1589633242882339895177.jpg
Next add the ginger garlic paste along with the dry masala and saut it until the oil leaves the side of the pan.

Step 4
wp-1589633241743684789241.jpg
wp-15896332394652094672055.jpg
Put the Keema kaleji along with curd and saute it . Fry it till the masala and the keema comes together and the raw smell goes away . Then add two cups of water and cover it and let it cook on low flame for about ten minutes.

Step 5

Keema Kaleji
Keema Kaleji

Enjoy the Keema kaleji with roti, paratha or plain rice.

Tip

One can keep the consistency as per their taste 

Murg Mussallam

There are several variations of murg musallam and almost every family has its own take on this traditional whole chicken recipe. For me, murgh musallam means taste of nostalgia since for generations it has been an integral part of our family wedding menu. No wedding reception till this day is complete without our very own murgh musallam. And it was originally cooked by a proficient muslim cook named khudoos and later his son murshid who had an expertise in old mughlai khana. Although they are no more, but luckily my family managed to document the recipe though they were very secretive about the same. Murgh mussallam is a mughlai style whole chicken recipe stuffed with boiled egg and dry fruits and slow cooked in curd and onion based sauce. It is an incredible dish to pamper your family and friends for those special occasions. It takes a little time and patience but believe me it is so rewarding and delicious.

Ingredients

Chicken : 1 whole ( remove all the integral organ from the cavity of the chicken)

Marination

Curd : 1 cup

Ginger paste : 2 tsp

Garlic paste : 1 tsp

Red chilli powder : 2 tsp

Garam masala powder : 1 tsp

Salt : as required

For the stuffing

Hard boiled eggs : 2 (shell removed)

Fried onion : 2

Khoya : 100 gms

Kaju : 10

Kishmish : 10

Green chilli : 5 to 6

Mint leaves 

Coriander leaves

Garam masala powder : 1 tsp

Salt : 1 tsp

Step 1
img_20191116_10044075373533.jpg
Wash the chicken thoroughly from outside and clean the cavity by placing it under running water.

Step 2
img_20191116_100710989910549.jpg
Make deep incision with sharp knife.

Step 3
img_20191116_1010401071898299.jpg
In a bowl whisk together curd, Ginger paste, garlic pastel, garam masala powder, red chilli powder and salt.

Step 4
img_20191116_1013081233266258.jpg
Marinate the whole chicken along with the cavity evenly with the curd mixture. Refrigerate it for at least an hour.

Step 5
img_20191116_1126563453312.jpg
In a separate bowl, mix the fried onion, khoya, dry fruits, mint and coriander leaves, garam masala along with eggs and salt.

Step 6
img_20191116_113356809585510.jpg
Stuff the cavity with the egg mixture.

Step 7
img_20191116_1136082019265119.jpg
Tie the legs of the chicken using a kitchen twine.this will help the stuffing from falling out.

Step 8
img_20191116_122545754498532.jpg
Heat 4 tsp oil in a thick bottom pan.

Step 9
img_20191116_1226171513617168.jpg
Layer the sliced onion over it.

Step 10
img_20191116_123529396146072.jpg
 Top it with the chicken along with the marinade and kashmiri red chilli powder.

Step 11
img_20191116_123110933987723.jpg
First let it cook on high flame for about 5 to 7 minutes.
Flip the chicken gently to the other side.

Step 12
img_20191116_123624316416198.jpg
Lower the flame and cover the lid. Let it cook on medium heat for about 25 minutes and after every 5 minutes make sure to rotate the chicken onto the other side for even cooking.

Step 13
img_20191116_125602759453642.jpg
After half an hour flip chicken and pour the sauce over it and let it cook for another 10 minutes.

Step 14
img_20191116_135752521942207.jpg
Switch off the heat and let the chicken rest in pan for about ten minutes. Now gradually transfer the murgh musallam into the serving dish and pour the rest of the masala over the chicken.

Tip

For a perfect soft and tender chicken try to marinate the chicken a day before the actual cooking.

Custard and Jelly

Custard and jelly is a colourful and classic dessert that is both elegant and comforting at the same time. Anubhav, my first born loves home made sweets. Such was his love for it during his growing up years ,that my fridge would always be loaded with custard and it’s different variations. But now all grown up and off to hostel, I indeed miss those sweet custard days. Since, custard and jelly was a regular affair at my place, I thought of sharing the same with my readers. Because it is made using readymade jelly and custard packets, it is quick and easy to make. It is a double layered dessert recipe with custard at the bottom and jelly on top. Serve it in general or personal portion along with fruits of your choice and enjoy it’s zestful flavour.

Ingredients

Milk : ½ litre

Sugar : 4 tsp

Custard powder : 6 tsp

For jelly

Prepare jelly according to the packet instructions.

Step 1
img_20191013_1137291837191801.jpg
Mix the custard powder in ½ cup of cold milk.

Step 2
img_20191013_1138051177756412.jpg
Boil the rest of the milk along with sugar and let the sugar dissolve completely.

Step 3
img_20191013_113958773573370.jpg
Once done reduce the flame and add the custard mixture whisking it continuously so that no lump is found. Once it reaches its desired consistency, switch off the flame.

Step 4
img_20191013_1142301173495831.jpg
Evenly spread the custard in the serving dish and let it cool down and set .

Step 5
img_20191013_121318533418687.jpg
In a bowl open the jelly packet and mix both the granules together.

Step 6
img_20191013_1214051681205100.jpg
Pour 250 ml of hot water into the jelly granules and stir it until it dissolves.

Step 7
img_20191013_121534386164647.jpg
Pour the jelly over the set custard and let it cool and leave it until it sets over the top of the custard.

Step 8
img_20191013_1312441952600005.jpg
Once done place it back in the fridge. Serve it chill along with fruits of your choice.

Tip

Let the custard be a little thicker than the normal one.

Ghant aur puri ( Tyohar ki Thali )

या देवी सर्वभूतेषु शक्ति-रूपेण संस्थिता। नमस्तस्यै नमस्तस्यै नमस्तस्यै नमो नमः॥

Ma Durga, the Divine Mother is one of my favourite deity and all throughout the year I eagerly wait to welcome my ma during the festival of Dussehra. It retrieve my childhood memories of Durga Puja celebration in our ancestral temple. It was all about family reunion, food, devotion and joy. Although, I belong to a non vegetarian family, but it is only during this period that we happily embrace the vegetarian food and that also without onion and garlic. Something is there about this festival that makes the surrounding so devotional and pious. And so it’s the perfect time to go for a special satvik food and the recipe of ghant is indeed a must try food for such special occasions. Ghant is our family recipe of mixed vegetables along with few specific masalas. It tastes so delicious that you might definitely not miss the crunchy onion and flavourful garlic. Enjoy it with puri and wish you all a very happy and blessed dussehra. 

Ingredients

Chole : 2 tsp soaked overnight

Potato : 2

Yam : 1

Pumpkin : 100 gms

Brinjal : 1 small

Doodhi : 100 gms

Radish : 1 small

Parwal : 2

Panch foran : ½ tsp

Aestofatid : ¼ tsp

Turmeric Powder :  1 tsp

Bayleaf : 3 to 4

Curd : 2 tsp

Ginger : 1 tsp

Salt : as per taste

Oil : 3 tsp

For dry powder

Coriander seed : 2 tsp

Cumin seed : 1 tsp

Peppercorn : 8 to 10

Fenugreek seeds : ¼ tsp

Saunf : ¼ tsp

Whole red chili : 2 

Step 1

img_20190929_1258262006938324.jpg

Soak the chole overnight.

Step 2
img_20190929_1257571150589459.jpg
Cut all the vegetables in equal size.

Step 3
img_20190929_1210021150258395.jpg
Dry roast the whole masala and make a masala powder out of it.

Step 4
img_20190929_1302201973170049.jpg
Pressure cook the vegetables and chole along with salt, turmeric and bay leaf . ( Just two whistle)

Step 5
img_20190929_1330352116862650.jpg
Take a pan and 4 tsp of oil. Once hot add hing and panch foran.

Step 6
img_20190929_133213160984336.jpg
Add grated ginger and saute it.  Next add coriander powder, turmeric, red chilli powder along with salt.

Step 7
img_20190929_133436439993361.jpg
Once all the masala comes together add curd and stir them all together until the oil leaves the side of the pan. Then turn the vegetables in the pan and give them all a good mix and let it come to a boil.

Step 8
img_20190929_133845621817678.jpg
Sprinkle the powdered masala and top it with a tsp of ghee.

Step 9
img_20190929_13433693625129.jpg

Serve ghant along with Pori .

Tip

Do not overcook the vegetables

Chicken Keema pockets

Chicken Keema pockets

Being repetitive with the menu makes my son dullish. And so every time at such, I have to come up with a new and innovative recipes to impress him so that he has less complain in life. Here I have tried chicken Keema pockets in  Chinese style. keema, I feel is a very versatile non veg form which can be used in making varieties of delicacy. It is a perfect way to give a meaty twist to a traditional food and elevate it to a fusion level. So lighten your mood with chicken Keema in a small and tasty packets.

Ingredients

For the dough

Maida : ½ kg

Oil : 4 tsp

Salt : 1 tsp

Lukewarm water : as required

Stuffing

Chicken mince : 1/2 kg

Red , yellow and green capsicum : 1 each

Onion : 1

Crushed Ginger and garlic : 2 tsp each

Soya sauce : 1 tsp

Tomato sauce: 1 tsp 

Vinegar : 1 tsp

Schezwan chutney : 2 tsp

Salt : as required 

Oil: for frying

Step 1


img_20190827_123325281138903.jpg

img_20190827_1240231483381591.jpgIn a mixing bowl  add flour, salt, oil and lukewarm water and knead a soft smooth dough.cover it with damp cloth and let it rest for half an hour.

Step 2
img_20190827_1257001107536069.jpg
Cut the capsicum into small cubes.

Step 3
img_20190827_1301081612626578.jpg
Add oil in pan and saute the crushed Ginger and garlic.

Step 4
img_20190827_130220459766741.jpg
Saute onions along with Ginger and garlic until it turns translucent.

Step 5
img_20190827_130253784891509.jpg
Next add the capsicum and let it all cook together. 

Step 6
img_20190827_1304101643368567.jpg
Once it becomes soft add chicken mince along with 1 tsp salt and saute it.


Step 7
img_20190827_130634637234750.jpg
Cover the lid and let it cook for about fifteen minutes or until the Keema becomes tender.

Step 8
img_20190827_1312521203208149.jpg
Open the lid and add all the sauces and stir them all together.

Step 9
img_20190827_1316101947233267.jpg
Take it out and let it cool.

Step 10
img_20190827_1332241386552067.jpg
Take a ball from the dough and flatten it with the help of rolling pin.cut out into squares from it.

Step 11
img_20190827_13335149475145.jpg
Add the prepared stuffing into it.

Step 12
img_20190827_13344730775114.jpg
Fold it carefully and press it lightly to seal the edge with the help of a fork and make a pocket out of it.

Step 13
img_20190827_1342391426998348.jpg
Shallow fry until golden brown and crispy.

Step 14

img_20190827_1352521255413805.jpg

Serve it with sauce of your choice.

Tip

The lukewarm water helps the dough to be soft and the secret behind a perfect outer crust of the pocket is of course a good dough.


Microwave Chocolate Mug Cake

Siddharth is my thirteen years old multi-talented nephew who is more like a son to me.on my visit to his house,this young cooking enthusiast surprised me with a mouth watering chocolate mug cake that was served within ten minutes. Impressed with his cooking skill, I decided to post the same recipe for my blog. It is a perfect dessert recipe that is ready in almost short span of five minutes including the preparation time. The chocolate makes the recipe even more delicious. The chocolate mug cake is indeed one of the easiest dessert recipe and a sweetest treat by a young teenager for his aunt. Indeed a perfect end to any day.

Ingredients

Refined flour or atta : 4 tsp

Powdered sugar : 2 tsp

Cocoa powder : 2 tsp

Baking powder : ¼ tsp

Vegetable oil : 2 tsp

Milk : 4 to 5 tsp

Kit kat : one small strip

Salt : a pinch

Step 1
WhatsApp Image 2019-07-26 at 8.13.36 PM(1)
In a microwaveable mug take all the dry ingredients and mix it well with the help of a fork.

Step 2
WhatsApp Image 2019-07-26 at 8.13.36 PM(8)
Now add oil and milk and give it a good mix. 

Step 3
WhatsApp Image 2019-07-26 at 8.13.36 PM(11)
Adjust the milk for a ribbon consistency batter.Top it with chocolate pieces.

Step 4
WhatsApp Image 2019-07-26 at 8.13.36 PM(13)
Set the microwave at 900 power and place the mug in the oven. Microwave it for 2 minutes.

Step 5
img_20190725_133301205021370.jpg
Your mug cake is ready.

Tip

One can use choco chips and serve it with chocolate syrup for even better taste.

Soya Mughlai Paratha

Paratha is a staple Indian food and especially in Northern part of India, a day is incomplete without their very own paratha.From plain to stuffed, it is enjoyed in any form. Mughlai paratha is a popular Bengali street food and I have tried a veg version of it with soya granules. With 52% protein content, it is indeed a powerhouse recipe for your dear ones. combine it with your favorite chutney and relish the divine flavour of soya keema mughlai paratha.

Ingredients

For the dough

Maida: 250 gms

Oil: 2 tsp

Salt: 1 tsp

For the stuffing

Soya keema: 200 gms

Onion: 2

Green chilli: 6 to 7

Garlic paste: 1 tsp

Coriander powder: 2 tsp

Turmeric powder: 1 tsp

Green peas: 50 gms

Garam masala powder: 1 tsp

Lemon juice: 2 tsp

Kasuri methi: 1 tsp

Salt : as per taste

Oil : for frying

Step 1

img_20190613_1844201007716838.jpg
Step 1: Soya Mughlai Paratha

Soak the soya keema in hot water along with salt. Drain it out after 5 to 7 minutes or until they become soft. Once cool squeeze the extra water from it and keep it aside.

Step 2

img_20190613_1924171963513952.jpg
Step 2 : Soya Mughlai Paratha

Knead maida along with oil and salt. Cover it with a damp cloth and let it rest for at least half an hour.

Step 3

img_20190613_1840281704696530.jpg
Step 3: Soya Mughlai Paratha

Add onion in a hot oil and Fry them until done. Add the rest of the masala and saute it until the oil leaves the side of the pan.

Step 4

img_20190613_1841321688718795.jpg
Step 4 : Soya Mughlai Paratha


Now put the peas and saute it along with the masala.


img_20190613_184524138770532.jpg
Step 5 : Soya Mughlai Paratha


Once the peas is coated with the masala add soya granules and let them cook together.

Step 6

img_20190613_185040728754516.jpg
Step 6 : Soya Mughlai Paratha


Once done sprinkle kasuri methi along with coriander leaf and lemon juice. Keep it aside and let it come to room temperature.

Step 7

img_20190613_1938301618474704.jpg
Step 7 : Soya Mughlai Paratha

Roll the dough into a thin rectangular sheet.

Step 8

img_20190613_193914836783657.jpg
Step 8 : Soya Mughlai Paratha

Place the filling in the centre of the sheet.


Step 9

img_20190613_193944990455054.jpg
Step 9:Soya mughlai paratha


Now fold the four sides of the sheet inward, starting with the longer side forming an envelope shape. Now press down gently and seal the sides.

Step 10

img_20190613_1942122124996967.jpg
Step 10 : Soya Mughlai Paratha

Heat oil in a frying pan and shallow Fry until golden brown and crispy.

Final Step

img_20190613_195647-11766710746.jpg
Food Ready : Soya Mughlai Paratha

Enjoy the soya mughlai paratha with chutney.

Tip

One can replace the soya keema with any other vegetable of your choice.

Cinnamon Flavoured Mutton (दालचीनी गोश्त )

                                                                Eid Mubarak !!!
One may have tasted the best of the cuisine that the world has to offer but there is always one such recipe that remains close to your heart and that could give a run for money to all such classy cuisine. I am indeed blessed to have a good hearted chachi who has introduced me to world of such lost recipes that has been there for ages and passed on from generation to generation. Dalchini gosht is my aunt’s secret recipe that has been handed down to her by her mother. It is a very classic recipe and am trying to gather and document such great family recipe. It is a subtle flavoured mutton preparation infused with warm Cinnamon fragrance.

Ingredients:

Mutton : 1 kg

Onion : ½ kg cut into roundles

Shah jeera : ½ tsp

Whole coriander : ¼  tsp

Clove : 4 to 5

Green cardamom : 2 to 3

Bay leaf : 4 to 5

Garlic : 8 to 10 split

Ginger : 4 tsp grated

Kashmiri whole chilli : 10

Cinnamon stick : 1 ½ inch

Oil : 1tsp

Ghee : 4 tsp

Curd : 4 tsp

Sugar : a pinch

Salt : as per taste

Step 1
img_20190602_111957291346584.jpg
Marinate mutton with shah jeera, onion, ginger, slit garlic , clove,green cardamom, bay leaf along with salt and oil. Keep it aside and let it marinate it for at least an hour.

Step 2
img_20190602_1102311589078471.jpg
Deseed the red chilli and soak it for about ten minutes.Grind the red chilli along with Cinnamon stick into a smooth paste.

Step 3
img_20190602_1236571104326425.jpg
Add 4 tsp of curd in the chilli mixture and whisk it all together.

Step 4
img_20190602_114436128409100.jpg
Take a thick bottom pan and put the ghee in it. Add a pinch of sugar and let it caramelise.

Step 5
img_20190602_1146031290732119.jpg
Now add the mutton with the marinade and Fry it on high flame for about four to five minutes .

Step 6
img_20190602_1150071580169617.jpg
Add the water such that it reaches the level of the mutton or until the mutton pieces gets soaked. Once boiled lower the flame and cover it and let it Cook.

Step 7
img_20190602_130042308694321.jpg
When ¾ done open the lid and add the curd, chilli and dalchini mixture . Cover it and let it Cook until it is done and the masala and the mutton comes together and becomes soft and tender.

Step 7
img_20190602_1353471828788549.jpg
Serve it on a bed of rice or  with any Indian bread of your choice.

Tip

Use Kashmiri red chilli for a perfect red colour.

Paneer Malai Tikka ( Creamy Grilled Cottage Cheese)

Paneer malai tlkka is a succulent veg kebab marinated in yoghurt, cream along with other mild favoured spices. The name itself tells you what to expect from the dish —- melt in your mouth texture and delight to your palate. Since paneer malai tikka is less spicy recipe, it is especially relished by the kids. Infact this is my children’s one of the favourite veg recipe and have the tendency to eat an extra serving. It is a perfect dish for celebration and gathering and can be served as an appetiser, snack or main course along with naan, bread or roti.

Ingredients:

Paneer: 400gms

Hung curd: 100 GM’s

Grated cheese :4tsp

Cornflour: 2tsp

Cream: 6tsp

Chat masala: 1tsp

Green cardamom powder: a pinch

Kasuri methi: 1tsp

Mustard oil: 1tsp

Capsicum: 1 diced

Onion: 1 diced

Salt: as per taste

Butter: for brushing

For grinding:

Green chillies: 8 to 10

Ginger: 2 inches

Garlic: 8to10 cloves

Follow step by step instructions

Step 1:
img_20190318_173153-21532438926.jpg
Grind ginger, garlic and green chillies into a smooth paste.

Step 2:
img_20190318_173750-2939034981.jpg
In a bowl mix Hung curd, cheese, cream, ginger, garlic and green chilli paste, kasuri methi, chat masala, green cardamom powder, cornflour and salt.

Step 3:
img_20190318_173935-2508695360.jpg
Whisk it all together and add a Tsp of Mustard oil into it.

Step 4:
img_20190318_174248-2955152512.jpg
Add the paneer pieces and gently mix them with the help of a spatula. Let it marinate for at least an hour.

Step 5:
img_20190318_174954-21499199253.jpg
Arrange it in a skewer or tooth pick along with capsicum and onion.

                  Or
img_20190318_180127-2379824689.jpg
Grill the paneer tikka in the air fryer

and air-fry for 10 to 12 minutes at 200 degree celcius. Once half done brush with butter and cook it further till done.

Step 6:
img_20190318_183336-21474130126.jpg
Serve it along with salad of your choice.

Tip:

Mustard oil gives the pungent aroma to the kebab