Prawn Tikka

A few days back while cleaning my cupboard, l  came across an old cookery book lying unnoticed in the shelf. As I started to turn its pages,    I chance upon few breathtaking kebab recipes and prawn tikka instantly caught my attention and decided to give a try. It turned out to be of intense flavour and unparalleled taste. And so here I am with the recipe since I strongly believe that the only way to treat these hidden treasure is to pass it on and circulate to increase its value. The taste and aroma of prawn tikka will definitely knock you off your feet. I have retained the tail of the prawns to make it crunchy from outside and juicy inside.

Ingredients:

Prawns : 1 kg de-veined

First marinade

Lime juice : 2 tsp

Salt : 1 tsp

Second marinade

Hung curd : 1 cup

Garlic paste : 3 tsp

Ginger paste : 4 tsp

Pepper : 1 tsp

Ajwain : 1 tsp

Cream : 6 tsp

Grated cheese : 6 tsp

Garam masala powder : 1 tsp

Besan : 4 tsp ( dry roasted)

Salt : As required

Butter: For brushing

Step 1

img_20191214_093737-12117428033.jpgMarinate the prawns with salt and lemon juice and keep it aside for at least half an hour.

Step 2

img_20191214_1050191795161153.jpgMix the curd with the rest of the ingredients and give it all a good whisk.

Step 3

img_20191214_1054541615445029.jpgSqueeze the extra moisture from the marinated prawns. Now mix it with the second marinade and let it rest for at least an hour.

Step 4

img_20191214_1321001538611277.jpgPierce the prawn through thin bamboo skewers .

Step 5

img_20191214_1322221818605990.jpgPlace the skewers in the griddle pan at a medium heat for about ten minutes brushing wit the rest of the marinade and melted butter.

Step 6

img_20191214_1335382070806466.jpg
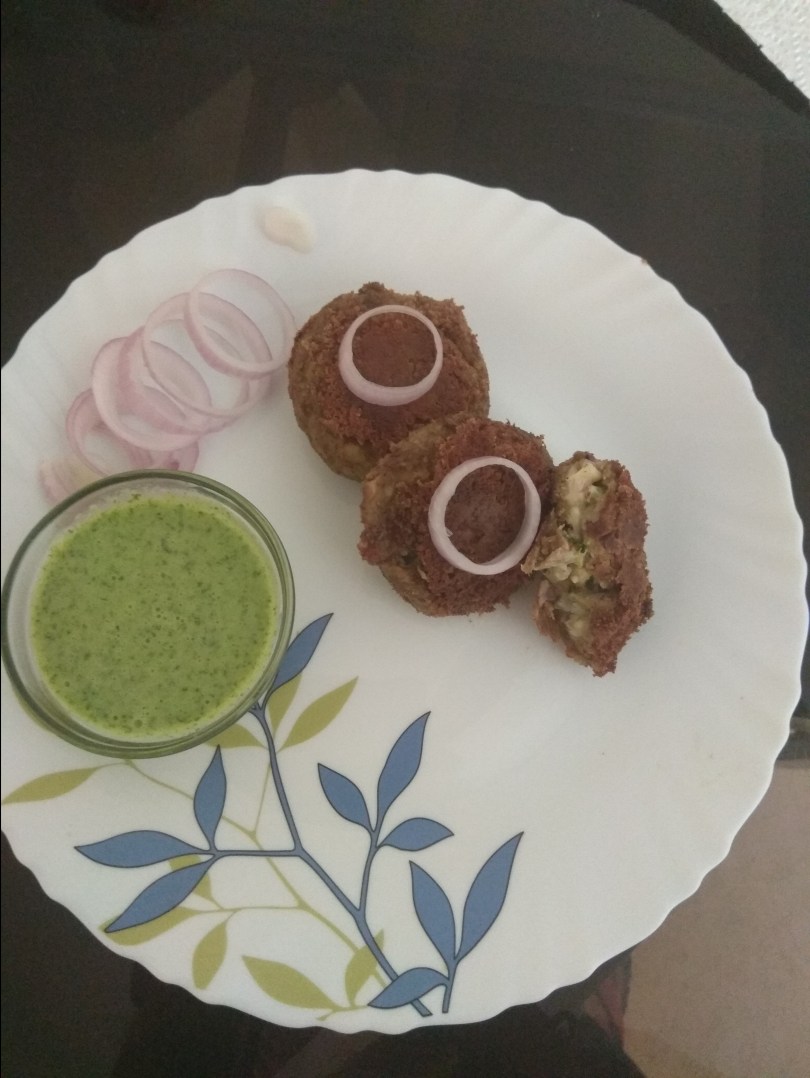
Once done serve it with salad of your choice.

Tip

Do not overcook the prawn as it will become tough and chewy.
soak the bamboo skewers in water for at least half an hour before using it.


Matar ki potli

” Unless you try to do something beyond what you have already mastered, you will never grow”.

To me, life is all about evolution and l enjoy each day as a part of the process of learning. On my visit to Delhi for my nephews wedding, I was amazed by scrumptious vegetarian spread. But actually the potli shaped snack was the crowd puller. It not only looked awesome but tasted even better. And with green peas in the season, I thought of trying it out for my family and friends and the end result was so outstanding that here i am with the same recipe. Matar potli is an interesting variation of traditional matar ki kachori. A perfect tea time snack for your loved ones.

Ingredients

For the dough

 Maida : 250 gms

Oil : 3 tsp

Ajwain : ½ tsp

Salt : 1 tspFor

Warm water : to knead as required

 For the filling

Peas : 1 cup

Hing : a pinch

Onion : 1

Grated ginger : 1 tsp

Cummin : 1 tsp

Green chilli : 4 crushed

Coriander powder : 1 tsp

Garam masala powder : 1 tsp

Amchur powder : ½ tsp

Coriander : 2 tsp fresh and chopped

Mozzarella cheese : 75 gms grated

Salt as required

Oil : 2 tsp

Step 1
img_20191127_180406439327452.jpg
Knead a tight dough with maida, ajwain, salt, oil and lukewarm water. Cover and keep it aside for at least 15 to 20 minutes.

Step 2
img_20191127_123524988582131.jpg
Add oil in a pan. Once hot add hing and jeera and let it clutter. Then add onion and let it turn translucent.

Step 3
img_20191127_123755713091458.jpg
Next put ginger and green chilli and give them all a good mix.

Step 4
img_20191127_1240101476051012.jpg
Add green peas along with coriander powder, amchur, garam masala and salt.

Step 5
img_20191127_1242091385001017.jpg
Stir them all together. Reduce the heat and cover the pan and let it cook for seven to eight minutes stirring occasion. In case if the masala sticks to the pan, sprinkle a few drops of water to prevent it from burning.

Step 6
img_20191127_1248391719808505.jpg
Once done take out the peas,garnish it with coriander and let it cool.

Step 7
img_20191127_184158720811267.jpg
Divide the dough into equal sized balls and roll each one of them into small circle. Place a tsp of stuffing in the centre of the circle and top it up with grated cheese. Now slowly bring the edges together and by pinching it’s neck shape it like a potli.

Step 8
img_20191127_1854041627908247.jpg
Heat enough oil in a thick bottom pan and deep fry the potlis on a low flame until they are crispy and done.

Step 9
img_20191127_1914421169318080.jpg
Serve the matar ki potli along with sauce or chutney of your choice 

Tip

One can add potato or paneer mixture with the peas.


Murg Mussallam

There are several variations of murg musallam and almost every family has its own take on this traditional whole chicken recipe. For me, murgh musallam means taste of nostalgia since for generations it has been an integral part of our family wedding menu. No wedding reception till this day is complete without our very own murgh musallam. And it was originally cooked by a proficient muslim cook named khudoos and later his son murshid who had an expertise in old mughlai khana. Although they are no more, but luckily my family managed to document the recipe though they were very secretive about the same. Murgh mussallam is a mughlai style whole chicken recipe stuffed with boiled egg and dry fruits and slow cooked in curd and onion based sauce. It is an incredible dish to pamper your family and friends for those special occasions. It takes a little time and patience but believe me it is so rewarding and delicious.

Ingredients

Chicken : 1 whole ( remove all the integral organ from the cavity of the chicken)

Marination

Curd : 1 cup

Ginger paste : 2 tsp

Garlic paste : 1 tsp

Red chilli powder : 2 tsp

Garam masala powder : 1 tsp

Salt : as required

For the stuffing

Hard boiled eggs : 2 (shell removed)

Fried onion : 2

Khoya : 100 gms

Kaju : 10

Kishmish : 10

Green chilli : 5 to 6

Mint leaves 

Coriander leaves

Garam masala powder : 1 tsp

Salt : 1 tsp

Step 1
img_20191116_10044075373533.jpg
Wash the chicken thoroughly from outside and clean the cavity by placing it under running water.

Step 2
img_20191116_100710989910549.jpg
Make deep incision with sharp knife.

Step 3
img_20191116_1010401071898299.jpg
In a bowl whisk together curd, Ginger paste, garlic pastel, garam masala powder, red chilli powder and salt.

Step 4
img_20191116_1013081233266258.jpg
Marinate the whole chicken along with the cavity evenly with the curd mixture. Refrigerate it for at least an hour.

Step 5
img_20191116_1126563453312.jpg
In a separate bowl, mix the fried onion, khoya, dry fruits, mint and coriander leaves, garam masala along with eggs and salt.

Step 6
img_20191116_113356809585510.jpg
Stuff the cavity with the egg mixture.

Step 7
img_20191116_1136082019265119.jpg
Tie the legs of the chicken using a kitchen twine.this will help the stuffing from falling out.

Step 8
img_20191116_122545754498532.jpg
Heat 4 tsp oil in a thick bottom pan.

Step 9
img_20191116_1226171513617168.jpg
Layer the sliced onion over it.

Step 10
img_20191116_123529396146072.jpg
 Top it with the chicken along with the marinade and kashmiri red chilli powder.

Step 11
img_20191116_123110933987723.jpg
First let it cook on high flame for about 5 to 7 minutes.
Flip the chicken gently to the other side.

Step 12
img_20191116_123624316416198.jpg
Lower the flame and cover the lid. Let it cook on medium heat for about 25 minutes and after every 5 minutes make sure to rotate the chicken onto the other side for even cooking.

Step 13
img_20191116_125602759453642.jpg
After half an hour flip chicken and pour the sauce over it and let it cook for another 10 minutes.

Step 14
img_20191116_135752521942207.jpg
Switch off the heat and let the chicken rest in pan for about ten minutes. Now gradually transfer the murgh musallam into the serving dish and pour the rest of the masala over the chicken.

Tip

For a perfect soft and tender chicken try to marinate the chicken a day before the actual cooking.

Custard and Jelly

Custard and jelly is a colourful and classic dessert that is both elegant and comforting at the same time. Anubhav, my first born loves home made sweets. Such was his love for it during his growing up years ,that my fridge would always be loaded with custard and it’s different variations. But now all grown up and off to hostel, I indeed miss those sweet custard days. Since, custard and jelly was a regular affair at my place, I thought of sharing the same with my readers. Because it is made using readymade jelly and custard packets, it is quick and easy to make. It is a double layered dessert recipe with custard at the bottom and jelly on top. Serve it in general or personal portion along with fruits of your choice and enjoy it’s zestful flavour.

Ingredients

Milk : ½ litre

Sugar : 4 tsp

Custard powder : 6 tsp

For jelly

Prepare jelly according to the packet instructions.

Step 1
img_20191013_1137291837191801.jpg
Mix the custard powder in ½ cup of cold milk.

Step 2
img_20191013_1138051177756412.jpg
Boil the rest of the milk along with sugar and let the sugar dissolve completely.

Step 3
img_20191013_113958773573370.jpg
Once done reduce the flame and add the custard mixture whisking it continuously so that no lump is found. Once it reaches its desired consistency, switch off the flame.

Step 4
img_20191013_1142301173495831.jpg
Evenly spread the custard in the serving dish and let it cool down and set .

Step 5
img_20191013_121318533418687.jpg
In a bowl open the jelly packet and mix both the granules together.

Step 6
img_20191013_1214051681205100.jpg
Pour 250 ml of hot water into the jelly granules and stir it until it dissolves.

Step 7
img_20191013_121534386164647.jpg
Pour the jelly over the set custard and let it cool and leave it until it sets over the top of the custard.

Step 8
img_20191013_1312441952600005.jpg
Once done place it back in the fridge. Serve it chill along with fruits of your choice.

Tip

Let the custard be a little thicker than the normal one.

Ghant aur puri ( Tyohar ki Thali )

या देवी सर्वभूतेषु शक्ति-रूपेण संस्थिता। नमस्तस्यै नमस्तस्यै नमस्तस्यै नमो नमः॥

Ma Durga, the Divine Mother is one of my favourite deity and all throughout the year I eagerly wait to welcome my ma during the festival of Dussehra. It retrieve my childhood memories of Durga Puja celebration in our ancestral temple. It was all about family reunion, food, devotion and joy. Although, I belong to a non vegetarian family, but it is only during this period that we happily embrace the vegetarian food and that also without onion and garlic. Something is there about this festival that makes the surrounding so devotional and pious. And so it’s the perfect time to go for a special satvik food and the recipe of ghant is indeed a must try food for such special occasions. Ghant is our family recipe of mixed vegetables along with few specific masalas. It tastes so delicious that you might definitely not miss the crunchy onion and flavourful garlic. Enjoy it with puri and wish you all a very happy and blessed dussehra. 

Ingredients

Chole : 2 tsp soaked overnight

Potato : 2

Yam : 1

Pumpkin : 100 gms

Brinjal : 1 small

Doodhi : 100 gms

Radish : 1 small

Parwal : 2

Panch foran : ½ tsp

Aestofatid : ¼ tsp

Turmeric Powder :  1 tsp

Bayleaf : 3 to 4

Curd : 2 tsp

Ginger : 1 tsp

Salt : as per taste

Oil : 3 tsp

For dry powder

Coriander seed : 2 tsp

Cumin seed : 1 tsp

Peppercorn : 8 to 10

Fenugreek seeds : ¼ tsp

Saunf : ¼ tsp

Whole red chili : 2 

Step 1

img_20190929_1258262006938324.jpg

Soak the chole overnight.

Step 2
img_20190929_1257571150589459.jpg
Cut all the vegetables in equal size.

Step 3
img_20190929_1210021150258395.jpg
Dry roast the whole masala and make a masala powder out of it.

Step 4
img_20190929_1302201973170049.jpg
Pressure cook the vegetables and chole along with salt, turmeric and bay leaf . ( Just two whistle)

Step 5
img_20190929_1330352116862650.jpg
Take a pan and 4 tsp of oil. Once hot add hing and panch foran.

Step 6
img_20190929_133213160984336.jpg
Add grated ginger and saute it.  Next add coriander powder, turmeric, red chilli powder along with salt.

Step 7
img_20190929_133436439993361.jpg
Once all the masala comes together add curd and stir them all together until the oil leaves the side of the pan. Then turn the vegetables in the pan and give them all a good mix and let it come to a boil.

Step 8
img_20190929_133845621817678.jpg
Sprinkle the powdered masala and top it with a tsp of ghee.

Step 9
img_20190929_13433693625129.jpg

Serve ghant along with Pori .

Tip

Do not overcook the vegetables

Nutrela ki tehri

Basanti has been my house help for the last fifteen years and has gradually become my soul sister. With my children all grown up, she not only helps with my household chores but also gives me company in loneliness. Basanti cooks amazing tehri and so i thought of sharing her recipe with all.

Tehri is a very popular north indian rice preparation which is enjoyed especially during winters with seasonal vegetables like peas, carrots and cauliflower. I have also added Soya chunks along with vegetables to make the dish even more flavourful and wholesome. Enjoy this healthy and nutritious one pot meal along with raita and pickle.

Ingredients

Rice: ½ kg

Onion : 1

Tomato : 2

Garlic : 6 to 8 pods

Soya chunk : 30 to 35 pieces

Potato : 1

Peas : ½ cup

Carrot : 1 

Cumin seed : 1 tsp

Clove : 4

Black cardamom : 2

Green cardamom : 2

Cinnamon stick : 1

Bay leaf : 2 to 3

Coriander powder : 2 tsp

Red chilli powder : 2 tsp

Turmeric powder : 1 tsp

Salt as per taste

Step 1
img_20190912_125640-11206537645.jpg
Clean, wash and soak the rice for at least half an hour.

Step 2
img_20190912_123702-1362295305.jpg
Soak Soya chunks in salted warm water. After ten minutes, squeeze the water and keep it aside.

Step 3
img_20190912_125520-11468902013.jpg
Cut the vegetables into small pieces.

Step 4
img_20190912_125826-11905866998.jpg
Heat 4 tsp oil in a pan. Add the sliced garlic and saute it unless it becomes fragrant.

Step 5
img_20190912_125920-11158130620.jpg
Next add the whole garam masala along with Cumin seed and let all the spices crackle .

Step 6
img_20190912_130230-11449668061.jpg
Put the onion and saute till golden brown.

Step 7
img_20190912_130814-1224955631.jpg
Then add the tomatoes and cook it till becomes tender. Add the vegetables along with Soya chunks and all the dry masala. Saute it until the oil leaves the side of the pan.

Step 8
img_20190912_131046-1851885969.jpg
Add the soaked and washed rice and mix them all together for a couple of minutes.

Step 9
img_20190912_131452-11709221614.jpg
Add 4 cups of water.

Step 10
img_20190912_131524-11307297448.jpg

Cover the pan and let it come to a boil and then lower the flame for about fifteen minutes or until the rice gets cooked and the grains are soft and fluffy.

Step 11
img_20190912_133436-11989973458.jpg

Once done let it remain in the vessel for at least five minutes and then serve it with raita or plain curd.

Tip

The ratio of basmati rice and water is normally 1:2.

You can add any other vegetables of your choice.


Chicken Keema pockets

Chicken Keema pockets

Being repetitive with the menu makes my son dullish. And so every time at such, I have to come up with a new and innovative recipes to impress him so that he has less complain in life. Here I have tried chicken Keema pockets in  Chinese style. keema, I feel is a very versatile non veg form which can be used in making varieties of delicacy. It is a perfect way to give a meaty twist to a traditional food and elevate it to a fusion level. So lighten your mood with chicken Keema in a small and tasty packets.

Ingredients

For the dough

Maida : ½ kg

Oil : 4 tsp

Salt : 1 tsp

Lukewarm water : as required

Stuffing

Chicken mince : 1/2 kg

Red , yellow and green capsicum : 1 each

Onion : 1

Crushed Ginger and garlic : 2 tsp each

Soya sauce : 1 tsp

Tomato sauce: 1 tsp 

Vinegar : 1 tsp

Schezwan chutney : 2 tsp

Salt : as required 

Oil: for frying

Step 1


img_20190827_123325281138903.jpg

img_20190827_1240231483381591.jpgIn a mixing bowl  add flour, salt, oil and lukewarm water and knead a soft smooth dough.cover it with damp cloth and let it rest for half an hour.

Step 2
img_20190827_1257001107536069.jpg
Cut the capsicum into small cubes.

Step 3
img_20190827_1301081612626578.jpg
Add oil in pan and saute the crushed Ginger and garlic.

Step 4
img_20190827_130220459766741.jpg
Saute onions along with Ginger and garlic until it turns translucent.

Step 5
img_20190827_130253784891509.jpg
Next add the capsicum and let it all cook together. 

Step 6
img_20190827_1304101643368567.jpg
Once it becomes soft add chicken mince along with 1 tsp salt and saute it.


Step 7
img_20190827_130634637234750.jpg
Cover the lid and let it cook for about fifteen minutes or until the Keema becomes tender.

Step 8
img_20190827_1312521203208149.jpg
Open the lid and add all the sauces and stir them all together.

Step 9
img_20190827_1316101947233267.jpg
Take it out and let it cool.

Step 10
img_20190827_1332241386552067.jpg
Take a ball from the dough and flatten it with the help of rolling pin.cut out into squares from it.

Step 11
img_20190827_13335149475145.jpg
Add the prepared stuffing into it.

Step 12
img_20190827_13344730775114.jpg
Fold it carefully and press it lightly to seal the edge with the help of a fork and make a pocket out of it.

Step 13
img_20190827_1342391426998348.jpg
Shallow fry until golden brown and crispy.

Step 14

img_20190827_1352521255413805.jpg

Serve it with sauce of your choice.

Tip

The lukewarm water helps the dough to be soft and the secret behind a perfect outer crust of the pocket is of course a good dough.


Cheesy chana Shami kebab

The cheesy chana Shami kebab works magical for the vegetarian days to uplift your mood easily. Believe me, this kebab not only tastes exceptional but at the same can beat any of the non veg kebabs without doubt. High in protein content, it has crispy outside and soft and succulent inside. The cheese and onion stuffing gives an extra kick to this traditional muglai kebab. Go ahead and try it as an excellent starter.

For pressure cook:

Black chana : 250 gms

Onion : 1

Ginger: ½ inch

Garlic : 4 to 5

Coriander seed : 1 tsp

Cumin : 1 tsp

Peppercorn : 8 to 10

Black cardamom : 1

Green cardamom : 1

Clove : 1

Cinnamon : 1

Salt : as per taste

For the kebab :

Onion : 1

Green chilli : 2

Grated cheese : ½ cup

Lemon juice : 1 tsp

Chat masala : 1 tsp

Coriander leaves

Oil : for frying

Step 1

Soak the chana overnight.

Step 2

img_20190812_1159341726011565.jpg

Pressure cook the chana along with onion, coriander seed, Cumin, Ginger, garlic, peppercorn, Black cardamom, green cardamom, cinnamon and salt.

Step 3

img_20190812_1200302043510095.jpg

Add 1 cup of water and let it cook for one whistle and ten minutes on low flame.

Step 4

img_20190812_1237181456071010.jpg

Once done, take it out and let it cool. If any water is left, cook again and dry out the water.

Step 5

img_20190812_1246301687471527.jpg

In the meantime grate cheese and mix it along with green chilies, onion, coriander leaves and chat masala.

Step 6

img_20190812_1249181509020137.jpg

Grind the chana in a mixie.do not add water while grinding. Just add two tsp of oil or butter to prevent the mixture from getting dried up.

Step 7

img_20190812_130405126911814.jpg

Make a disc from the dough and fill it up with the cheese stuffing.

Step 8

img_20190812_131643704195278.jpg

Make small round shaped kebabs.

Step 9

img_20190812_1319021310411718.jpg

Shallow fry the kebabs until golden brown.

Step 10

img_20190812_132819363649109.jpg

Enjoy the cheesy kebab with green chutney.

Tip

Keep the mixture dry or the kebabs will break while frying.

You can use chickpea flour or besan in case the kebabs become difficult to handle

Meatballs in spinach gravy

Palak Mutton Keema Kofta Curry ( Meatballs in Spinach Gravy )

The simple, flavourful and aromatic palak mutton Keema kofta curry is my mom’s signature dish. This very recipe is indeed cooked by my mother herself in a stew style with very mild flavours. The spinach too is picked up from her kitchen garden and she in particular is highly emotional about her home grown vegetables. She even concluded that the dish tasted better not because of her cooking skill but only because of her organic baby spinach. On the contrary, I felt that since the meat balls are allowed to cook in the simmering gravy , the taste and texture of this dish is elevated to an altogether different dimension. The lightly sauteed onions imparts such a mild flavours to the meat ball as well as the gravy. One just needs to be a little extra careful with the koftas as it could disintegrate if not handled properly.

Ingredients

For the kofta

Mutton Keema : 800 gms

Onion : one large

Ginger paste : 1 tsp

Garlic paste : 1 tsp

Green chilies : 3 to 4

Garam masala powder : 1 tsp

Lemon juice

Mustard oil : 2 tsp

Coriander leaf

Salt : as per taste

For the gravy

Spinach : 800 gms washed and thinly sliced

Onion : 400 gms

Whole red chilli : 8 to 10

Jeera : 1 tsp

Coriander seed : 1 tsp

Black pepper corn : 20 to 25

Black cardamom : 2

Green cardamom : 5

Clove : 10

Dalchini : 3 small sized

Bay leaf : 3 to 4

Ginger paste : 1 tsp

Garlic paste : 1 tsp

Salt : as per taste

Oil 4 tsp

Step 1
img_20190714_123658-11501378090.jpg
Add chopped onion, green chilli, coriander leaves, Ginger and garlic paste, lemon juice, oil and salt into the raw Keema.

Step 2
img_20190714_1239211582374875.jpg
Give them all a good mix.

Step 3
img_20190714_125822-188118236.jpg
Apply oil in hand and make small round ball shaped koftas. Put it in the fridge for an hour so that the kofta becomes firm.

Step 4
img_20190714_132518855502195.jpg
Saute onion in hot oil for a minute.

Step 5
img_20190714_132629-1222039169.jpg
Add whole garam masala, red chilli, Ginger garlic paste, salt and stir it for a couple of minutes.

Step 6
img_20190714_132756-12027293902.jpg
Add approximately 3 cups of water and let it come to a boil.

Step 7
img_20190714_133110-11157101744.jpg
Now place the koftas one by one into the boiling mixture . Do not stir or mix the koftas as they could disintegrate. Let the gravy come to a boil.

Step 8
img_20190714_133628697051599.jpg
Now add the sliced palak.

Step 9
img_20190714_133641-1486731273.jpg
Cover the lid and let it cook on a high flame for ten minutes and then lower the flame and cook it until the kofta becomes firm.

Step 10
img_20190714_140756823401232.jpg
Check it out after fifteen to twenty minutes to see if the onions have become soft and meat meatballs are done and gravy has reached the desired consistency.

Step 11
img_20190714_141219474114238.jpg
Set aside in a serving dish and enjoy with rice or roti. 

Tip

One may increase the quantity of spinach as per your taste and requirements.


Tandoori Rohu Fish

” The more you praise and celebrate your life, the more there is in life to celebrate.”

Birthdays are always special and it is my blogs first birthday. And to tune in with my beloved husband’s birthday, l have a sudden burst of excitement in cooking something new and exciting. Since food is the only gesture I know to express my love and appreciation, I came up with the idea of finger licking grilled fish recipe. It is an extremely easy recipe and can be made any day of the week. Enjoy cooking

Ingredients

Fish : ½ kg ( with bone)

For the marinade

Hung curd : 100gms

Ginger paste : 1tsp

Garlic paste : 1tsp

Tandoori masala powder : 2tsp

Kashmiri red chilli powder : 2 tsp

Carom seed : ½ tsp

Kasoori methi : 1 tsp

Mustard oil : 2 tsp

Chaat masala : 1 tsp

Lemon juice : 1 tsp

Cornflour : 1 tsp

Salt : as per taste

Step 1
Cheating marination
In a bowl mix together Hung curd, Ginger garlic paste, tandoori masala powder, Kashmiri red chilli powder,kasoori methi, carom seed, Mustard oil,chat masala, lemon juice, cornflour and salt.

Step 2
img_20190707_12593594922261.jpg
Add the pieces of fish to the marinade. Gently rub the marinated fish and keep it aside for at least a couple of hours.

Step 3
img_20190707_130121171081842.jpg
Place the fish on the air fryer and let it cook at 200 degree c for about 10 minutes or until done.

Step 4
img_20190707_131341433064881.jpg
Once done brush it with butter.

Step 5
img_20190707_132342910210312.jpg
Serve it with onion rings and lemon.

Tip

Marinate the fish for a longer time so that the fish soaks the flavour evenly.