Dates, carrot and walnut cake with zero added sugar

Dates, carrot and walnut cake with zero added sugar

Delicious, moist and healthy cake with the goodness of dates, carrot and wallnut is a delightful guiltfree indulgence. My husband was diagnosed with diabetes almost a decade ago and as an ardent sweet lover it became an hulrricane task to beep keep him away from desserts.As a result I kept on trying innovative recipes in my kitchen with sugar substitute. Recently I came across a simple and easy healthy cake recipe with no added sugar and an amazing taste. This healthy cake recipe with the sweetness of dates is a must try as an alternative to classic cake recipe.
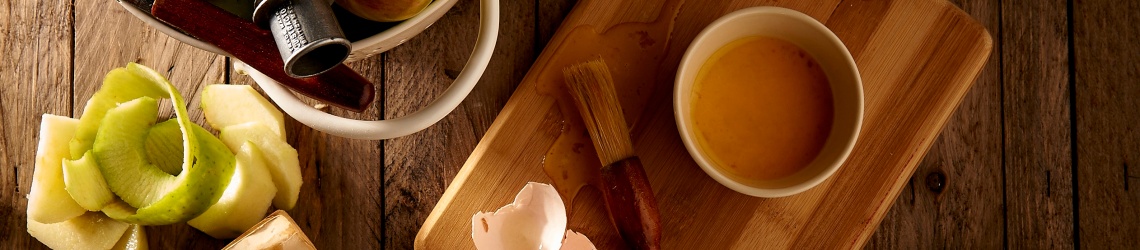
Ingredients
Dates – 16 to 18
milk -1 /4 cup
Flour– 1 cup
Grated carrot – 3/4
Egg-2
Butter– 100 grams
walnut – 7- to 10
Baking powder-1/4 tsp
baking soda –1/2 tsp
Vanilla essence – 1/4tsp


step 1

In a small pan add the deseeded dates and milk and let it boil and simmer for a couple of minutes.

Step 2


Let it cool and make a paste in a blender

step 3

Grate the carrot and squeeze the excess water.

step 4

Melt the butter and add the dates paste to it. Gradually add the grated carrot and egg to the butter and combine them all together with the help of a whisk.

step 5

Sieve the flour along with the baking powder and baking soda

Step 6

Now add the wet mix to the dry one. Add the Vanilla essence and chopped walnut. Fold the mix gradually until they all combine together.

Step 7

Preheat the oven at 160 degree Celcius. Pour the cake batter in a greased container

step 8


B

Bake for about 40 minutes at 160 degree celcius until done.
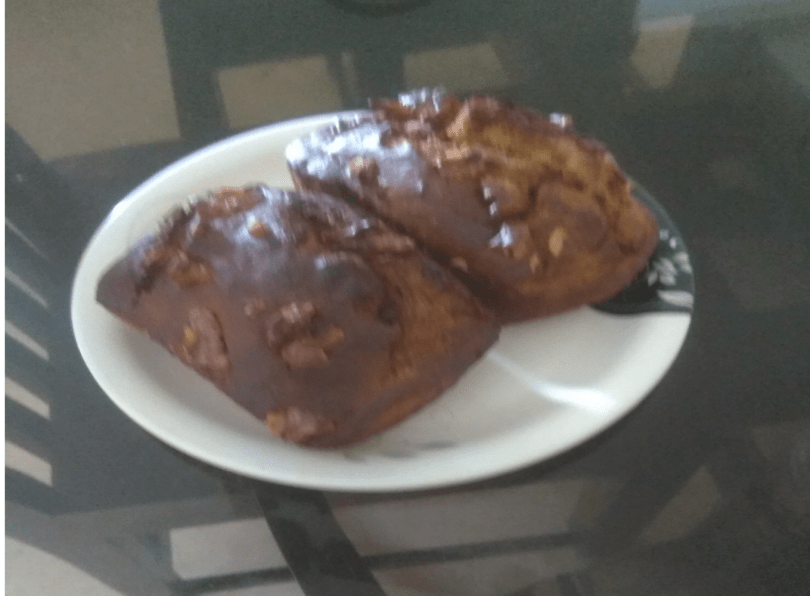
step 9

Cool and enjoy the cake.

Tip

soaked dates adds moisture and texture tothe cake.

To check the cake, insert a knife or toothpick in it and if it comes out clean then the cake is done.

Go back

Your message has been sent

Warning
Warning
Warning
Warning

Warning.

Read More »

Mango stuffed kulfi 

Summer is all about mango and each time it brings back the loving memories of my dearest mother in law who was an intense mango lover. Mangoes literally ruled her heart and she believed that no other food can match the aroma and taste of this incredible fruit and here I dedicate this dish to the doting lady” Ma”. Although I keep on trying creative recipes with mango, believe me the mango stuffed kulfi is beyond compare. It is a simple dish where the milk is reduced by boiling and sweetened and then stuffed in the mango. A must try recipe, simple yet amazing.

Ingredients

Mangoes : 4

Full cream milk : 1 litre

Sugar : 4 tsp

Cardamom powder : a pinch

Kesar : 10 to 12 strings


Step 1

To scoop the seed from the mangoes, cut the crown and with the help of a sharp knife cut along the seed. Make sure not to cut the edges.

Step 2

Now with the help of a grip twist the seeds to loosen it. Gradually pull out the seed.

Step 3

Squeeze the excess pulp from the seed and keep it aside.

Step 4

Boil the full cream milk in a thick bottom pan. Lower the flame and reduce it until it comes down to ⅓ in volume, stirring occasionally. To this add sugar, cardamom powder and kesar, mix well and switch off the flame after a couple of minutes. Let it cool.

Step 5

Once cool add the mango pulp and mix it well.

Step 6

Pour the rabari in the mangoes and cover with the crown.

Step 7

Place the mangoes straight in the container, let it freeze for at least 8 to 10 hours or until set.

Step 8

Peal it with the help of a sharp knife.

Step 9

Cut into roundles.

Step 10

Garnish with saffron string and enjoy the incredible dessert.

Tip

Use firm mangoes for a perfect result.


 Rohu Matar ( Fish curry with Peas)

No matter how much you grow up and age, the childhood memory of your mom’s cooking is bound to have an influence on you and one could never match up to the same. And my story is no different with her being a great influence in my food journey. Her ability to cook the simplest food tastes best, something I look forward to inheriting from her. Rohu matar is my mom’s recipe, easy to make yet tastes amazing. A healthy recipe with the combination of seasonal vegetable and fish is a perfect treat for a winter brunch.

Ingredients

Rohu fish: ½ kg

Green peas : 100 gms

Onion : 2

Tomato : 1

Curd : 4 tsp

Coriander powder : 2 tsp

Turmeric powder : 1 tsp

Red chilli powder : 1 tsp

Ginger garlic paste : 2 tsp

Green chilli : 2

Mustard oil : for frying

Salt as per taste

Step 1

Grind onion and tomato into a smooth paste. In a bowl take a spoon full of water and add the ginger garlic paste, red chilli powder, turmeric powder and coriander powder and mix well to make a smooth paste.

Step 2

Marinate the fish with garlic paste, turmeric powder, red chilli powder, salt along with a tsp mustard oil and ground masala.

Step 3

Heat mustard oil in a pan and shallow fry the fish.

Step 4

Rohu matar is my mom’s recipe, easy to make yet tastes amazing. A healthy recipe with the combination of seasonal vegetable and fish is a perfect treat for a winter brunch.


Once done take it out in an absorbent paper.

Step 5

Heat oil in a pan and add the onion tomato paste along with prepared masala paste and saute until the oil leaves the side of the pan.

Step 6

Add the peas and cook it along with masala for about four to five minutes.

Step 7

Next add the curd and stir them all together for a couple of minutes.

Step 8

Add the required amount of water and let it come to a boil.

Step 9

Gradually add the fried fish into the gravy and cook on high flame for about five  minutes. Add the slit green chilli and switch off the gas.

Step 10

Garnish with coriander leaves and serve it along with steamed rice.

Tip

Fried cauliflower florets and peas is a match made in heaven that combines well with rohu.


Pani puri ( Ghup Chup )

Pani puri ( Ghup Chup)

Pani puri does not need any introduction since it tops the chart among the Indian street food. The crunchy Puri’s along with flavourful stuffing and sweet chutney filled with spicy Pani is to die for. Believe me the burst of flavor in your mouth is so heavenly that you want to eat unstoppably and eyes become bigger than the stomach. A perfect balance of sweet, tangy and spicy, trust me pani puri can never go wrong. Although it is found in almost every nook and corner of Indian streets but due to unhygienic ways it eventually puts you at health risk. So here is a mouth watering recipe that can be easily prepared at your home so that it could be enjoyed within your comfort zone. The puri is easily available throughout the length and width of the country.

For the pani

Mint leaves : 1 cup

Coriander leaves : ½ cup

Green chilli : 4

Garlic : 4 pods

Cumin seed : 1 tsp

Tamarind pulp : 2 tsp

Chat masala : 2 tsp

Black salt : 2 tsp

Chutney

Tamarind : 100 gms soaked and deseeded

Jaggery : 100 gms

Chili powder : 1 tsp

Salt : ½ tsp

Stuffing

yellow peas : 250 gms soaked overnight

Potato : 2 large

Turmeric powder : 1 tsp

Red chili powder : 2 tsp

Coriander powder : 2 tsp

Cumin powder : 1 tsp

Ginger garlic paste : 2 tsp

Salt as per taste

Step 1

Pressure cook the soaked peas along with turmeric powder, salt and water for about 5 whistles. Separately boil the potatoes.

Step 2

Heat oil in a kadai and add the ginger garlic paste and saute until the raw smell disappears. Next add the coriander powder, cumin powder, chili powder and chat masala and salt and cook them all together.
Add the boiled peas and stir till it comes to the boil, put the boiled and mashed potatoes and cook them together for a couple of minutes. Ragra is ready for the stuffing.

Step  3

Make the tamarind chutney by cooking together tamarind with jaggery, chili powder salt and chat masala. Cook them all together until the chutney reaches the desired consistency. Once done, keep it aside and let it cool.

Step 4

For the pani, grind together mint leaves, coriander leaves, green chili, garlic, cumin seed, tamarind paste, salt and chat masala.

Step 5

Transfer it in a large bowl and add about 3 to 4 cups of water whisk it together with the help of a spoon. The pani is ready. Put it in the fridge for some time before serving it.

Step 6

Stuff The puri with ragda , chutney and pani and enjoy the blast of flavor.

Tip

Boiled and mashed potatoes thickens the consistency of the ragda.


Paneer Pasanda

Gauri, a close pal of mine, is the Only vegetarian friend in the close circle of my friends. For an ardent meat lover it becomes a herculean task to to lay out an equally exotic and impressive vegetarian spread for a loved one. So this time when we decided to meet over dinner, I tried my hand on the delectable paneer pasanda for the very first time and to my surprise it turned out to be good enough to eat. Paneer slices sandwiched with dry fruits and served in tomato gravy, paneer pasanda is a must try dish. Serve it with lachcha paratha since they compliment each other really well. This dish involves extensive preparation and could be made for special occasions.

Ingredients

Paneer : 250 gms

Onion : 1

Tomato : 3

Cashew nut : 8 to 10 pieces

Ginger garlic paste : 2 tsp

Kasuri methi : 1 tsp

Red chilli powder : 2 tsp

Turmeric powder : ¼ tsp

Salt as required

Oil for frying

Cornflour : 4 tsp

Butter : 2 tsp

For stuffing

Green chilli coriander chutney : 1 tsp

Cashew nut : 2

Cheese : grated 2 tsp

Apricot : diced 2 tsp

Step 1

Cut a thick slice of paneer into two pieces with the thickness of half inch.

Step 2


Mix together the grated cheese, apricot, green chilli coriander chutney and diced cashews .

Step 3

Place a spoon full of stuffing on a paneer slice and top with the other slice. Repeat the same with the rest of the paneer .

Step 4

Dip in a cornflour slurry.

Step 5


Carefully fry the sandwiched paneer from both the sides.

Once done take it out in an absorbent paper.

Step 6

In a pan heat 2 tsp of butter and saute onion for a couple of minutes. Add cashew nut, sliced tomatoes and kasuri methi and fry them together for another three to four minutes. Next add half a cup of water and allow to cook for about ten minutes on medium heat.

Step 7

Let it cool down and grind into a smooth paste. Heat two tsp oil in a pan and add ginger garlic paste. Saute it and then add the ground paste along with red chilli powder, turmeric powder and salt. Cook them all together until the oil leaves the side of the pan. Add a cup of water and let it come to a boil.

Step 8

Gently place the paneer pasanda on the gravy and let it come to one boil. 

Step 9

Top it with cream and serve the pasanda with paratha or naan.

Tip

Apricot gives a sweet kick to the stuffing. You can even substitute it with raisins.


Kali mirch chicken ( Pepper chicken)

Looking up new recipes and trying out in my kitchen has been my passion for a long time and fortunately it has not faded with the passage of time. I came across a recipe for Kali mirch chicken while flipping through an old cookery book and found it so tempting that I could not resist but giving it a try. The dish turned out to be deeply satisfying and my family thoroughly enjoyed it. Kali mirch chicken With lustrous creamy gravy topped with the unmatchable flavour of pepper will never fail to impress your family and friends. A must try dish.

Ingredients

Marination

Chicken : 1 kg

Curd : 1 cup

Ginger garlic paste : 2 tsp

Salt

Pepper : 1 tsp

For gravy

Onion : 4

Cashew nut : 10 to 12

Green chilli : 6

Butter : 2 tsp

Coarsely ground pepper corn : 2 tsp

Cardamom powder : 1 tsp

Oil : 2 tsp

Chopped coriander stem : 2 tsp

Salt

Step 1

Marinate the chicken with curd, ginger garlic paste, a tsp salt and pepper. Cover it and keep it aside for at least half an hour.


Step 2

In a thick bottom pan add 2 tsp of butter and saute the sliced onion, green chilli and cashew nut for a couple of minutes stirring continuously. 

Step 3

Add ¼ cup of water and cover with the lid. Let it cook on high flame for 5 minutes until the onion becomes soft and moisture evaporates. 


Step 4

Once cool, grind it into a smooth paste.

Step 5

In another pan add two tsp of oil and add the onion paste and saute it stirring continuously for a couple of minutes.

Step 6

Add the marinated chicken and cook it on a high flame for five to seven minutes stirring occasionally. Reduce the flame and cover and cook for twenty minutes or until it is tender.

Step 7

Finally sprinkle the coarsely ground pepper along with cardamom powder and coriander stem. Let it come to a boil.

Step 8

Serve it along with Indian bread of your choice.

Tip

Do not use the coriander leaves but only its soft stem.

In case of need of gravy add a little water or milk while cooking.


Kothambir vadi ( cilantro fritters)

Kothambir vadi ( cilantro fritters)

Coriander is a very commonly consumed herb that is often used in traditional Indian food. It is exclusively used as a garnish to make the food presentable and palatable. During my growing up days we often relished the coriander chutney as an accomplishment along with the staple rice and dal during the winter season. It was only during my stay in Mumbai that I came across a new term Kothimbir or kothmir, the word used for coriander leaves in Maharashtra and the vada or the fritters made from it is a highly popular and simple Maharashtrian snack recipe . Little did I imagine that the humble dhaniya patta could be transformed into such a mind blowing delicacy. Basanti, my house help makes amazing kothimbir vadi and I am sharing her recipe with my readers. It is made using coriander leaves, gram flour and few other regularly used Indian spices. Soft from inside while crunchy and crisp outside makes it a perfect tea time snack.

Ingredients

Kothimbir : 2 bunches

Besan : 1 cup

Rice flour : ½ cup

Green chillies : 6 to 8

Garlic pod : 8

Turmeric powder : 1 tsp

Asafoetida : a pinch

Ajwain : ¼ tsp

Salt as per taste

Oil for frying

Step 1

Wash the coriander leaves and squeeze the excess water. Next finely chop and put it in a bowl. In the meantime grind the green chillies and garlic into a smooth paste.

Step 2

Add the besan, rice flour, green chilli and garlic paste, turmeric powder, ajwain, hing, salt and a tsp of oil.

Step 3

Add water and knead a tight dough. 

Step 4

In a steamer add 2 glasses of water and steam the rolled dough for 15 to 20 minutes on a medium flame. Insert a knife and if it comes out clean, the dough is done and if not then steam it further for another 7 to 10 minutes.

Step 5

Remove it from the steamer and let it cool down. Once it comes to the room temperature cut it into small pieces.

Step 6

Shallow fry the vada in a medium hot oil until they are golden brown.

Step 7

Serve the kothimbir vadi with chutney of your choice.

Tip

Rice flour adds the extra crunch to the vadi.

Veg Moti Pulao

A very happy bhai dooj to all my readers and to make the festivities even more grander here I am with the scrumptious one pot veg moti pulao recipe. Moti pulao is an awadhi delicacy that is extremely mild flavored with distinctive aroma of the spices. Although there are many versions of veg moti pulao but this one is a distinct one since the moti or the kofta is made from the masoor and moong dal . It may be a little tricky recipe but believe me the final outcome is worth all the hard work.

Ingredients

For the pulao

Basmati rice : 750 grams

Kewra essence : ½ tsp

Saffron : 12 string soaked in 4 tsp lukewarm milk

Rose water : 1 tsp

Onion : 2 thinly sliced and 1 roughly chopped

Sheh jeera : 2 tsp

Bay leaf : 4 to 5

Cinnamon stick : 2

Salt : as per taste

Ghee : 2 tsp

For the lentil ball

Masoor dal : 200 gms ( Wash & soak for 3-4 hours)

Moong dal : 100 gms ( Wash & soak for 3-4 hours)

Onion : 2

Black cardamom : 2

Green cardamom : 2

Bay leaf : 2 to 3

Ghee : 4 tsp

Silver vark : as required

Salt : as per taste

For grinding

Garlic pod : 10

Green chillies : 6 to 8

Ginger : 2 inch

Green cardamom : 2

Black cardamom : 1

Cinnamon stick : 2

Coriander seed : 1 tsp

Step 1

Deep fry sliced onion and take it out in an absorbent paper.

Step 2

Wash rice and soak in water for at least half an hour. Drain the excess water and spread the rice over a napkin.

Step 3

Wash the dal thoroughly and strain out the excess water. Grind it into a paste and do not add water while grinding.

Step 4


In a mixing jar put the green chilli, Ginger, garlic, corriander seed,1 black cardamom and 1 cinnamon stick along with 2 tsp water and make a smooth paste and mix them with the dal batter.

Step 5

Apply oil in your palm and make small pearl shaped balls.

Step 6

In a thick bottom vessel add 2 cup water along with onion slices,  2 bay leaf, cinnamon stick, 1 green cardamom , 1 black cardamom, salt and ghee. Let the water come to a boil and once hot gradually place the koftas one by one into it. At this stage do not try to stir and let it poach and cook until the water dries up completely.

Step 7

Once the kofta is firm add a tsp of ghee and stir it until they get a nice colour. Take them out and let them come to the room temperature. Next coat them with the silver vark. Keep them aside.


Step 8

Add 2 tsp ghee in a cooking vessel and put the bay leaf, shah jeera , cinnamon stick and cardomom. Once they splutter add the sliced onions and fry them till the onion becomes translucent.

Step 9


Add the rice and saute them all together for a couple of minutes . Next add water accordingly and cover and cook on a low flame. When ¾ done open the lid and add the safron milk, kewra and Rosewater . Place the koftas on the top and sprinkle the fried onions.

Step 10

Cover the lid and place the pan on the top of the tawa and let it cook for another 7 to 10 minutes so that the rice infuses all the aroma and flavours.

Step 11

Serve the moti pulao with raita.

Tip

Do not stir the koftas when they are soft as they would disintegrate.

Try not to overcook the rice.

Beat the dal batter with hand until they are light and fluffy.

Malvani Chicken Curry

Anything is possible when you have the right people to support you.”

Friendship is indeed a very simple word but it makes a life even more deeply than love. When I moved to Mumbai almost two decades back I not just left my family and state behind but also a part of me who seemed to be lost in a new environment. But god has been kind upon me to introduce me to a few good friends that I never realized would eventually mean so much to me. Swati is one among them who introduced me to the fabulous maharashtrian cuisine that was completely new to me. She is an outstanding cook herself and lovingly shared one of her most in demand recipes of the chicken malwani. My children refer to it as swati Aunty’s chicken curry and no matter how much effort I put in to cook the same they feel I could not match her cooking skill. This recipe is borrowed from her which is a traditional konkani recipe and its combination with kombi wade is to die for. The roasted coconut and spices elevates the curry to an altogether new dimension.

Ingredients

Chicken : 1 kg

Onion : 2 large

Tomatoes : 2 small

Ginger paste : 1 tsp

Garlic paste : 2 tsp

Turmeric powder : 1 tsp

Red chilli powder : 2 tsp

Salt

Oil : 3 tsp

For the wet masala

Coconut : 1 grated

Peppercorn : 10 to 12

Black cardamom : 1

Clove : 7 to 8

Dry red chilli : 3 to 4

Bay leaf : 2

Coriander seed : 1 tsp

Step 1

Marinate the chicken with ginger garlic paste, turmeric powder, red chilli powder and 1 tsp salt and let it rest for at least half an hour.

Step 2

In a pan add a tsp oil to roast the grated coconut along with coriander seed, peppercorn, black cardamom, clove, red chilli and bay leaf. Fry it on low flame until coconut leaves its aroma. It should be perfectly roasted since this is the secret to a good malvani chicken.

Step 3

Once cool grind it into a smooth paste. If required add a couple of tsp of water while grinding the masala.

Step 4

In a pan add oil and saute the onion til they are translucent. Next put the tomatoes along with red chilli powder and salt.

Step 5

As the tomatoes turn soft add the marinated chicken and mix them all together. Sate it on high flame for about five minutes stirring occasionally. Reduce the flame and cover the lid and let it cook for about twenty minutes or until the chicken is 3\4 done.

Step 6

Add the coconut masala and stir it so that the masala combines together and cook it for another ten minutes on low flame. If required add a glass of water for the desired consistency.

Step 7

Garnish the malvani chicken with coriander and enjoy it with the traditional kombi wade.

Tip

Tomatoes are optional.

This recipe is on the spicier side. One can reduce the red chilli as per your taste.


Chilka and chutney (Rice and lentil crepe)

The thin and crispy moong dal and rice chilka is a protein rich, high fibre power packed breakfast recipe. My younger sister Jaya makes some amazing chilka and I have borrowed this recipe from her. It is indeed the Indian version of crape where the rice and dal is soaked overnight and then blended into a smooth batter to make light and thin crispy Chilkas. Chilka literally translates peel and since these crepes are as thin as a peel it is probably called so. Combine it with spicy green chilli and garlic chutney to experience the tantalizing taste  to kick start a perfect day.

Ingredients

Rice : 2 cups

Moong dal : 1 cup

Garlic : 4 pod

Ginger : 1 inch

Green chilli : 4

Whole cumin : 1 tsp

Salt

Oil

For the chutney

Green chilli : 8 to 10

Garlic : 15 pod

Salt : 1 tsp

Lemon juice : 1 tsp

Sugar : a pinch

Step 1
wp-15929756369911382681830.jpg
Wash and soak rice and dal overnight.

Step 2
wp-15928936501631122307463.jpg
For the chutney coarsely grind that green chilli, garlic, salt, sugar and oil into paste.

Step 3
wp-1592893652322870728975.jpg
In a mixer jar blend the soaked rice and dal, garlic, ginger, salt and water to make a smooth runny batter. Next add the cumin seeds and mix it all together.

Step 4
wp-15928936481231343316121.jpg
Heat a griddle or tawa and with the help of a ladle spread it like a crepe. Drizzle one tsp oil over it and let it cook until it is golden brown. Flip and cook from the other side too. 

Step 5
wp-15929756626121646659049.jpg
Serve it hot with the chutney of your choice.

Tip

One can also use paneer or vegetables as a stuffing to make it even more healthy and exotic.