Aaru vadi

The taste and aroma of aaru vadi instantly reminds me of my great friend Radhika who introduced me to this scrumptious dish. Vadi evokes my memories of the dripping  rainy evenings we had spent together enjoying vadis cooked by her along with casual conversation and friendly chat. And since then it has become ritualistic to make aaru vadi in monsoon when the market is flooded with aaru patta. These colocasia leaves are loaded with health benefits and this crispy and delicious fritter is indeed a perfect way to include it in our diet. A must try recipe as the weather gets wet.

Ingredients

Aaru patta : 10 to 12

Masoor dal : 100 gms ( washed and soaked)

Rice : 2 tsp (washed and soaked)

Green chilli : 4

Garlic : 8 to 10

Ginger : 1 inch

Cummin : ¼ tsp

Asafoetida : a pinch

Peppercorn : ¼ tsp

Tamarind paste : 2 tsp

Coriander seed : 1 tsp

Salt as required

Oil for frying

Step 1

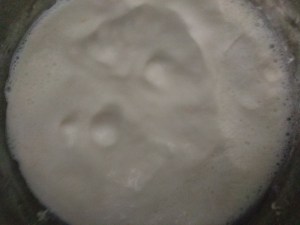
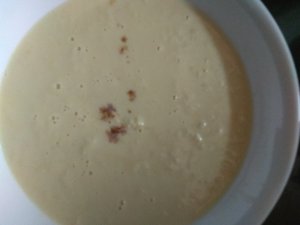
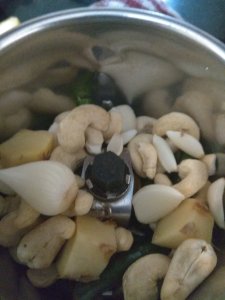
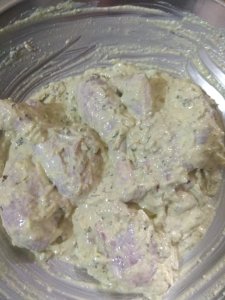
Grind the soaked rice and dal along with ginger, garlic, green chilli, cummin  peppercorn, coriander seed, tamarind paste and salt.

Step 2

Wash the aaru leaves and pat them dry. Place the leaf on a large plate and evenly spread the dal mix.

Step 3

Place the other leaf over it and coat the mixture. Repeat the process with the remaining leaves.

Step 4

Carefully seal the edges and roll the leaves. Place it in a steamer and steam for about 20 to 25 minutes.

Step 5

Once done, let it cool.

Step 6

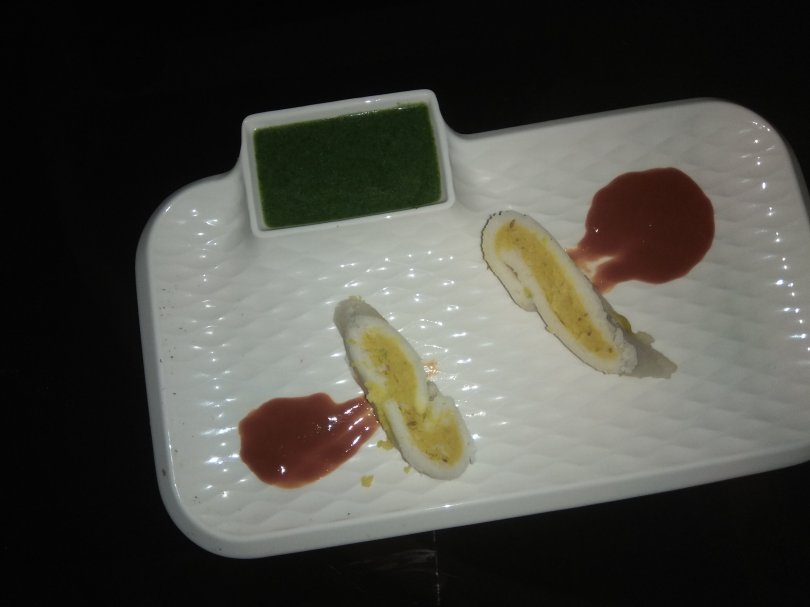
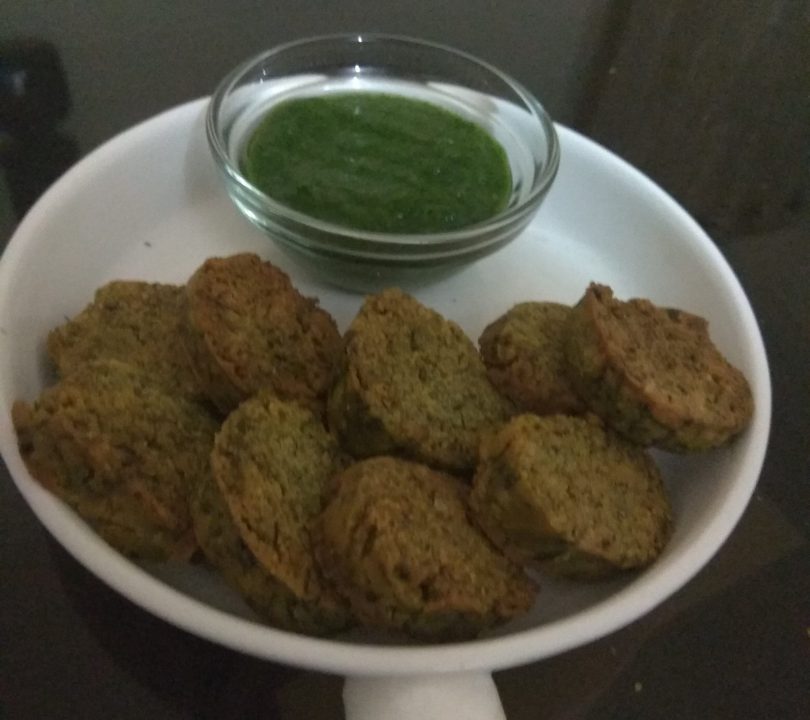
Slice them into roundles and shallow fry till crispy and golden brown.

Step 7

Serve it hot with chutney of your choice.

Tip

Let the roll cool down completely and then Slice it for a perfect roundle.

Do not use water while grinding dal since this will make it very runny.

Kali mirch chicken ( Pepper chicken)

Looking up new recipes and trying out in my kitchen has been my passion for a long time and fortunately it has not faded with the passage of time. I came across a recipe for Kali mirch chicken while flipping through an old cookery book and found it so tempting that I could not resist but giving it a try. The dish turned out to be deeply satisfying and my family thoroughly enjoyed it. Kali mirch chicken With lustrous creamy gravy topped with the unmatchable flavour of pepper will never fail to impress your family and friends. A must try dish.

Ingredients

Marination

Chicken : 1 kg

Curd : 1 cup

Ginger garlic paste : 2 tsp

Salt

Pepper : 1 tsp

For gravy

Onion : 4

Cashew nut : 10 to 12

Green chilli : 6

Butter : 2 tsp

Coarsely ground pepper corn : 2 tsp

Cardamom powder : 1 tsp

Oil : 2 tsp

Chopped coriander stem : 2 tsp

Salt

Step 1

Marinate the chicken with curd, ginger garlic paste, a tsp salt and pepper. Cover it and keep it aside for at least half an hour.


Step 2

In a thick bottom pan add 2 tsp of butter and saute the sliced onion, green chilli and cashew nut for a couple of minutes stirring continuously. 

Step 3

Add ¼ cup of water and cover with the lid. Let it cook on high flame for 5 minutes until the onion becomes soft and moisture evaporates. 


Step 4

Once cool, grind it into a smooth paste.

Step 5

In another pan add two tsp of oil and add the onion paste and saute it stirring continuously for a couple of minutes.

Step 6

Add the marinated chicken and cook it on a high flame for five to seven minutes stirring occasionally. Reduce the flame and cover and cook for twenty minutes or until it is tender.

Step 7

Finally sprinkle the coarsely ground pepper along with cardamom powder and coriander stem. Let it come to a boil.

Step 8

Serve it along with Indian bread of your choice.

Tip

Do not use the coriander leaves but only its soft stem.

In case of need of gravy add a little water or milk while cooking.


Shepherd Pie

Shepherd pie is a hearty comfort food, one of my childhood favorites  that goes over in the memory of my growing up years. In the bygone days of less eating out culture and not so much exposure to global cuisine, Keema pie was one such dish that gave a global fusion flavour in home style cooking. Spiced mutton mince cooked in Indian masala topped with mashed potatoes, the shepherd pie is one pot meal loaded with veggies and protein that adds to the spirit of a cold chilly night. It is indeed the Desi version of the classic shepherd pie and believe me that it is worth all the hard work.

Ingredients

Mutton mince : ½ kg

Peas : ½ cup

Carrot : ½ cup diced

Onion : 1

Ginger paste : 2 tsp

Garlic paste : 1 tsp

Red chilli powder : 1 tsp

Turmeric powder : ½ tsp

Salt : as per taste

Garam masala powder : 1 tsp

Oil : 2 tsp

For the mash potato

Potato : 2

Butter : 50 gms

Cream  : 2 tsp

Pepper : 1 tsp

Step 1

Clean the mutton mince and keep aside.

Step 2

Heat oil in a thick bottom pan and add the sliced onion. Saute until translucent and then add the ginger garlic paste and saute them together. Put the remaining masala along with salt and cook them together.

Step 3

Add the peas and diced carrot and cook it for a couple of minutes.

Step 4

Add the Keema and stir fry along with the masala. Lower the flame and sprinkle a few drops of water and cover the pan and let it cook for about 15 minutes or until done.

Step 5

Transfer the Keema into a baking dish.

Step 6

Peel and cut the potatoes into cubes and boil it for about 10 minutes along with salt and water. Once it turns soft strain it and mash it with the help of a fork. Mix 2 tsp of butter , cream and an egg yolk and sprinkle pepper powder.

Step 7

Spread the mashed potato over the Keema layer and evenly spread with the help of a spatula. Add a dollop of butter and bake it in a preheated oven at 180 degree C for about 15 minutes until the pie gets a nice golden crust.

Step 8

Once cool serve immediately and enjoy the Desi version of the classic British shepherd pie.

Tip

Add  grated cheese to the mashed potato for a creamier texture.


Kothambir vadi ( cilantro fritters)

Kothambir vadi ( cilantro fritters)

Coriander is a very commonly consumed herb that is often used in traditional Indian food. It is exclusively used as a garnish to make the food presentable and palatable. During my growing up days we often relished the coriander chutney as an accomplishment along with the staple rice and dal during the winter season. It was only during my stay in Mumbai that I came across a new term Kothimbir or kothmir, the word used for coriander leaves in Maharashtra and the vada or the fritters made from it is a highly popular and simple Maharashtrian snack recipe . Little did I imagine that the humble dhaniya patta could be transformed into such a mind blowing delicacy. Basanti, my house help makes amazing kothimbir vadi and I am sharing her recipe with my readers. It is made using coriander leaves, gram flour and few other regularly used Indian spices. Soft from inside while crunchy and crisp outside makes it a perfect tea time snack.

Ingredients

Kothimbir : 2 bunches

Besan : 1 cup

Rice flour : ½ cup

Green chillies : 6 to 8

Garlic pod : 8

Turmeric powder : 1 tsp

Asafoetida : a pinch

Ajwain : ¼ tsp

Salt as per taste

Oil for frying

Step 1

Wash the coriander leaves and squeeze the excess water. Next finely chop and put it in a bowl. In the meantime grind the green chillies and garlic into a smooth paste.

Step 2

Add the besan, rice flour, green chilli and garlic paste, turmeric powder, ajwain, hing, salt and a tsp of oil.

Step 3

Add water and knead a tight dough. 

Step 4

In a steamer add 2 glasses of water and steam the rolled dough for 15 to 20 minutes on a medium flame. Insert a knife and if it comes out clean, the dough is done and if not then steam it further for another 7 to 10 minutes.

Step 5

Remove it from the steamer and let it cool down. Once it comes to the room temperature cut it into small pieces.

Step 6

Shallow fry the vada in a medium hot oil until they are golden brown.

Step 7

Serve the kothimbir vadi with chutney of your choice.

Tip

Rice flour adds the extra crunch to the vadi.

Chicken Malai Tangri Kebab

My boy’s love for chicken is so deep and profound that whether I bake it, fry it or grill it definitely brings the brightest smile on their face. I get so exhausted and bored of cooking chicken repeatedly that I try to be further innovative with the recipes so that I could enjoy the cooking process more. Chicken tangri kebab or leg piece kabab is a very popular appetizer dish but here I have tried a different variation of it and my family thoroughly enjoyed it. Marinated in hung curd, cheese, cashew paste along with a handful of regular spices, the malai tangri kebab is of subtle flavour that is relished both as an appetizer or even a side dish. Cooked in a hot oven, the spicy aroma fills the entire household and is enough to tantalize your taste bud.

Ingredients

Chicken drumsticks : 8

Hung curd: 6 tsp

Kasuri methi : 1 tsp

Grated cheese : ½ cup

Ajwain : ¼ tsp

Cournflour : 2 tsp

Cardamom powder : a pinch

Mustard oil : 1 tsp

Melted butter for greasing

Lemon juice : 1 tsp

Salt as per taste

For the paste

Garlic : 7 to 8 pod

Ginger : 1 small piece

Green chilli : 6 to 8

Cashew nut : 8 to 10

Step 1

Slit the chicken drumsticks and marinate with lemon juice and salt and keep it aside for about fifteen minutes. Once done squeeze the marinate.

Step 2

Make a smooth paste with ginger, garlic, cashew and green chillies.

Step 3

In a bowl mix together the cashew paste, hung curd, grated cheese, salt, courflour, ajwain, kasoori methi, cardamom powder and mustard oil and mix them all together.

Step 4

Mix the chicken legs with the marinade. Give it all a good massage. Cover it and keep in the fridge for at least a couple of hours.

Step 5

Preheat the airfryer and place the chicken drumsticks on the tray and cook it for fifteen minutes at 200 degrees.

Step 6

Take the baking tray out and brush it with butter and cook it again for another ten minutes.Serve it hot with salad of your choice.

Tip

Make the incision in the drumsticks so that the marinate gets deep inside the flesh.

Chicken Vada Pav

Mumbai and it’s passion and love affair with vada pav is well known. This mouth watering snack enjoys immense popularity among the Mumbaikars and my boys are no different and especially the younger one. Recently on his visit to a food joint, he came across the non vegetarian version of this iconic snack called ” chicken vada pav”. Mesmerised by its aroma and flavor, he motivated me to give a try to this unique dish. Chicken keema cooked with regular spices and herbs, stuffed in the potato mix, dipped in gram flour batter and deep fried to perfection and finally sandwiched between the pav — an iconic dish with an iconic twist.Believe me, the explosion of flavours is worth all the hard work.

Ingredients 

For keema

Chicken mince : 200 gms

 Onion : 1

Ginger garlic paste : 1 tsp

Corriander powder : 2 tsp

Red chilli powder : 1 tsp

Turmeric powder : 1 tsp

Cinnamon stick : 1

Black cardamom : 1 

Green cardamom : 1

Lemon juice : 1 tsp

Salt as per taste

Green peas : 2 tsp

For potato mix

Potato : 4 boiled and mashed

Green chili : 4 to 6

Garlic : 6 to 7 pod

Turmeric powder : ½ tsp

Mustard seed : ½ tsp

Curry leaves

Salt

For the batter

Besan : 6 spoon

Ajwain : ½ tsp

Red chilli powder : 1 tsp

Salt as per taste

Oil for frying

Step 1

Take two tsp oil in a pan and add cinnamon, cardamom and cumin seed and let it splutter. Add the chopped onion and fry until golden brown.

Step 2

Add the ginger garlic paste, coriander powder, red chilli powder and salt and saute until the masalas are cooked. Next add the chicken mince and give them all a good mix. Put the peas and saute them all together.cover it with a lid and let it cook for ten to fifteen minutes until the keema is done stirring regularly.

Step 3

Sprinkle coriander leaves and add the lemon juice. Keep it aside and let it cool.

Step 4

In the meantime make a lump free and smooth thick batter with besan, salt, chilli powder and turmeric and water. Let it rest for sometime.

Step 5

In a pan heat 1 tsp oil and fry the green chillies and garlic. Once cool coursley grind it. 

Step 6

In the same pan add two tsp oil and add the mustard seeds and curry leaves and let it splutter and release the aroma. Next add the boiled and mashed potatoes along with turmeric and red chilli powder and salt and stir fry them until done. Let it cool.

Step 7

Grease your palm and make a ball with the potato mix and fill in two tsp keema in the centre and give it a shape like a round shaped vada.

Step 8

Dip the vada in the besan batter and deep fry and enjoy with pav and chutney.

Tip

One may use the soya keema for the veg version.


Stuffed Tandoori Chicken Breast

The stuffed tandoori chicken breast is a contemporary and flavorful twist to the monotonous chicken breast recipe. Its tangy, spicy flavor along with mild sweet stuffing is destined to become one of your favorite chicken preparations. All you have to do is to prepare the stuffing and marinate the chicken with few regular spices easily available in Indian kitchens. Finally grill it in an oven or airfryer and relish this guilt free exciting recipe along with garlic bread to enjoy the best of both the world.

Ingredients

Chicken breast : 2

For the first marination

Lemon juice : 1 tsp

Salt : 1 tsp

For the second marination

Hung curd : 6 tsp

Ginger paste : 1 tsp

Garlic paste : 1 tsp

Red chilli powder : 2 tsp

Salt : as per taste

Kasuri methi : 1 tsp

Ajwain : 1\4 tsp

Tandoori masala : 2 tsp

Mustard oil : 1 tsp

For the stuffing

Fried onion : 2 tsp

Khoya : 2 tsp

Cashew nut : 4 to 5

Green chilli : 2 to 3

Coriander : 1 tsp

Salt : 1\2 tsp

Step 1
wp-1599369577266263424135.jpg

Carefully make a pocket in the chicken breast by making a slit.

Step 2
wp-1599369573062175191377.jpg

Rub the lemon juice and salt in the chicken breast thoroughly. Keep it aside for at least half an hour.

Step 3
wp-15993695720121830153500.jpg

In a bowl combine together hung curd,ginger garlic paste, red chilli powder, kasuri methi, salt, ajwain, tandoori chicken masala and mustard oil. Whisk to make a smooth paste.

Step 4
wp-159936957517552824900.jpg
wp-1599369574088717693473.jpg
Mix the stuffing  together.

Step 5
wp-1599369570983629681223.jpg

Stuff the chicken breast with the khoya mix.

Step 6
wp-1599369569962745805499.jpg

Seal the edges with the tooth prick.

Step 7
wp-15993695688971497985738.jpg
Marinate the chicken with the hung curd mix. Keep it aside and let it rest for a couple of hours.

Step 8
wp-1599369567113295526030.jpg
Grill it on an airfryer at 180 degree c for almost 15 minutes or until done.

Step 9
wp-1599369707754518409041.jpgServe the tender and juicy chicken with bread of your choice

Tip

Marinate the chicken overnight for the best result.

Chicken Lollipop

No matter how old you become, when you are with your sibling you revert back to childhood.”

À couple of years back on my visit to my mom’s place, my dearest brother threw a surprise birthday party of mine since I happened to be there on that day almost after two decades. My beloved bhabhi along with her little angels left no stone unturned to make it a memorable one in spite of my father not being around. These little gestures are worth a thousand words. The menu included a fabulous spread but the one dish that stole my heart away was the scrumptious chicken lollipop. Although I had relished it a number of times earlier too, there was something about its taste that made it distinct. Indeed my recipe is borrowed from our hotel chef who willingly shared it with me. Try it yourself to experience the distinctive flavor of chicken lollipop.

Ingredients

Chicken lollipop : 12 pieces

Crushed ginger and garlic : 2 tsp

Onion : 1 thinly diced

Schezwan chutney : 2 tsp

Tomato sauce : 1 tsp

Soya sauce : 1 tsp

Vinegar : 1 tsp

Cournflour : 8 to 10 tsp

Salt : 1 tsp

Oil : for frying

Step 1
wp-1595134216639285785616.jpg

Marinate the chicken lollipop with onion, crushed ginger and garlic, schezwan sauce, tomato sauce, soya sauce, Vinegar, corn flour and salt.

Step 2
wp-15951342156131223221481.jpg

 mix it all together . try not to add water as the moisture of the sauce will help to combine all of them together. Cover it and let it marinate for about an hour.

Step 3
wp-1595134214494293878645.jpg

Deep fry the chicken lollipop in a thick bottom pan on a medium high flame until it is crispy and golden brown.

Step 4
wp-15951370411661554397698.jpg

Enjoy the crunchy chicken lollipop with sauce of your own choice.

Tip

The crushed ginger garlic and diced onion gives a unique flavor to the dish.

Rice flour dumpling ( पिट्ठा )

Pitha (पिट्ठा) is a traditional Bihari delicacy and an integral menu of its cuisine. These steamed dumplings are high in protein and a flavourful guilt free snack. My mom used to serve it as evening snacks and was thoroughly relished by my dearest father. And now I do the same for my husband who equally enjoys it. It is a very humble and rustic dish that would never disappoint you. Bihari dal pita is prepared with rice flour and is stuffed with spicy lentil filling. One just requires to have an artful attention to the details for the perfect outcome.

Ingredients:

Rice flour : 300 gms

Chana dal : 250 gms ( soaked overnight )

Green chilli : 6 to 7

Garlic : 10 to 14

Cummin seed : 1 tsp

Aesfotida : ½ tsp

Turmeric powder : ½ tsp

Salt : as per taste

Step 1:
img_20190521_130331528688700.jpg
Knead the dough by adding the rice flour in about half cup of hot water along with ½ tsp of salt.

Step 2:
img_20190521_1304411633929060.jpg
Mix it with the help of spatula. Cover the lid and keep it aside for few minutes.

Step 3:
img_20190521_1320091649260038.jpg
Knead the dough and cover it.

Step 4:
img_20190521_1236071765360886.jpg
In a mixing  jar put together chana dal, green chilli, garlic, cummin, handi and aesfotida and salt.

Step 5:
img_20190521_1243021609859778.jpg
Grind them together and make a smooth paste.

Step 6:
img_20190521_132530988962710.jpg
Flatten each of the balls carefully and fill the dal mixture.

Step 7:
img_20190523_184046742693453.jpg
Fold it into semicircle shape and place them in a grease steamer and steam it for about ten to fifteen minutes or until the dal filling gets cooked.

Step 8:
img_20190521_135553914033297.jpg
Once done take the Pitha out and let it cool down.

Step 9:
img_20190521_134943483389973.jpg
Slice them evenly and serve with green or red chutney

Tip:
Add extra dry rice flour if there is excess water in the dough.

The secret of good Pittha is the unique combination of spices Along  with the chana dal.

Mango Dessert (आम की खीर )

The great Indian summer is here and indeed a perfect time to enjoy the king of fruit —- mango. One cannot stop drooling over the delicious and juicy fruit as it is the best part of summer inspite of the scorching heat. This bright yellow fruit has made fan of all ages as it not only tastes good but is also loaded with health benefits. I have been enjoying the mango kheer since childhood and now so does my children. It is a very unusual yet delicious kheer with the goodness of sweetened and thickened milk along with juicy mango.

Ingredients

Full cream milk : 2 litre

Mango : 2

Sugar as per taste

Vanilla essence : 1 tsp

Dry fruit for garnish

Step 1
img_20190416_1156502018359942.jpg
Boil the milk in a thick bottom pan.

Step 2
img_20190416_1243111759599021.jpg
Let the milk cook on a medium high flame stirring continuously until the milk reduces almost half to its original volume.

Step 3
img_20190416_1320441790144829.jpg
Add the sugar and let it get dissolved.

Step 4
img_20190416_13312970740235.jpg
Once done take it out in a bowl. Once it comes down to the room temperature add the vanilla essence and let it cool further.

Step 5
img_20190416_1336291299325852.jpg
Cut one mango into small cubes and make pulp out of the second one.

Step 6
img_20190416_1338031570926926.jpg
Now mix the mango with the reduced milk and put it in the fridge.

Step 7
img_20190416_1344122111607585.jpg
Enjoy the chilled mango Kheer.

Tip

Do not ever add the mango in the hot milk as the milk will curdle.

Add the sugar accordingly since mango has its own sweetness.