Chicken Sukka

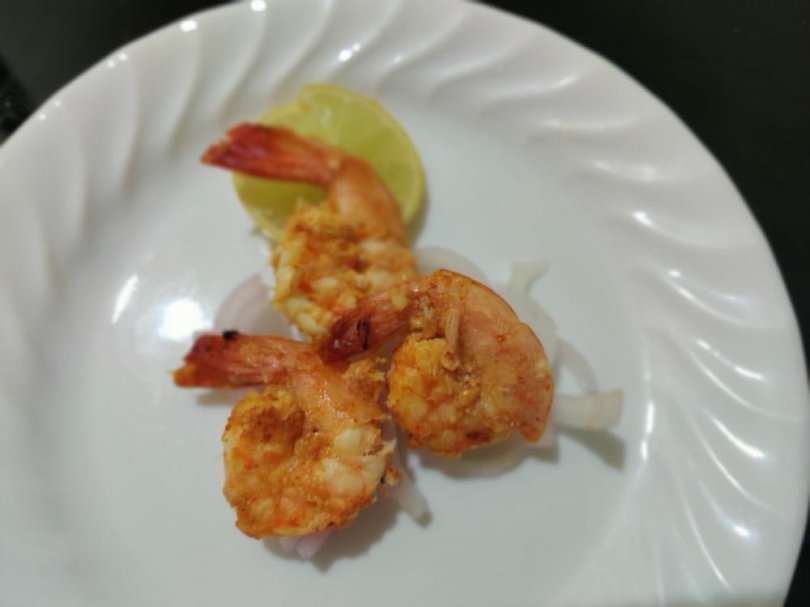
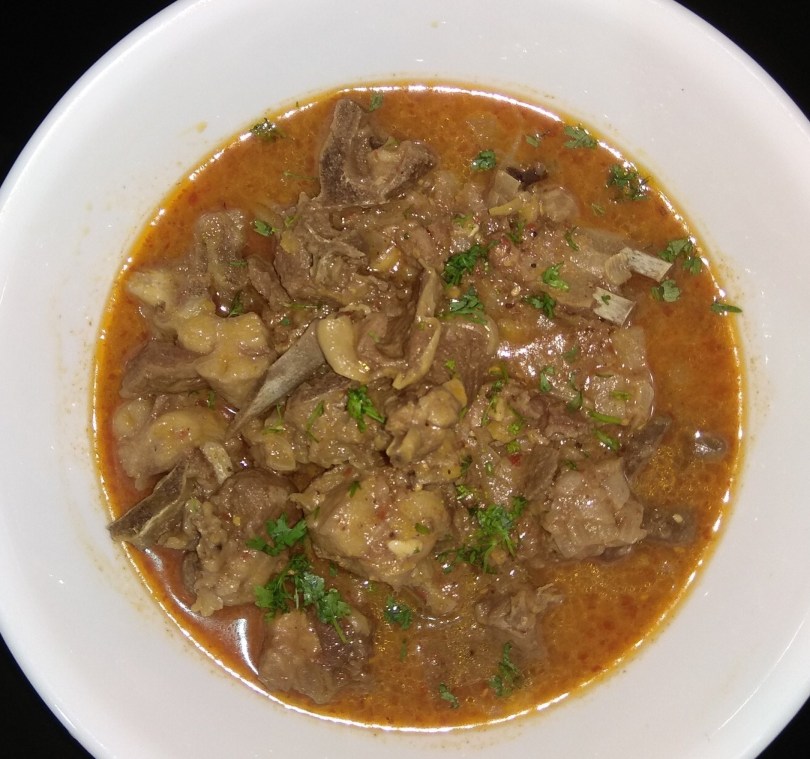
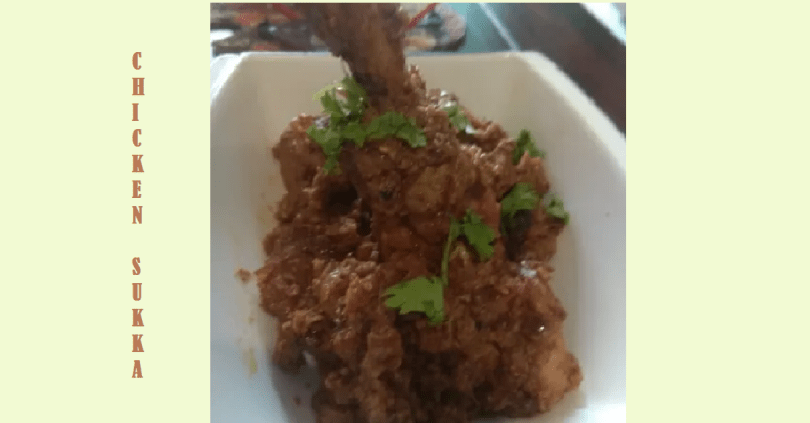
Chicken sukka is a Maharashtrian style dry chicken recipe that is a treat for spice loving people. In my growing up years the one and only recipe we knew about with coconut was the nariyal barfi. It was only after I moved to Mumbai that I realised that coconut was one of the key ingredients for the base of any gravy and now I enjoy exploring new recipes with this incredible ingredient. Coconut not only gives texture to a dish but also adds nutty flavour to it. Chicken sukka is cooked with aromatic spices along with coconut that gives it a distinct flavour. It is a semi dry dish that can be served both as a starter or even as a main course.

Ingredients

Chicken : 500 gms

Ginger garlic paste : 2 tsp

Onion : 2

Turmeric powder : 1 tsp

Oil : 2 tsp

Salt as per taste

For the wet masala

coconut : ½ cup

Red chilli : 6

Coriander seed : 2 tsp

Cumin seed : 2 tsp

Peppercorns : 6

Cinnamon : 1

Clove : 2

Green cardamom : 2

Black cardamom : 1

Sesame seeds : 1 tsp

Poppy seed : 1 tsp

Step 1

Dry roast all the above mentioned ingredients except the dry coconut . Once done, let it cool.

Step 2

In the same pan dry roast the grated coconut until it releases the aroma.

Step 3

Grind the coconut and roasted masala into a paste.

Step 4

Marinate the chicken with ginger garlic paste, turmeric powder, salt and a tsp of ground masala. Keep it aside for at Least half an hour.

Step 5

Heat oil in a wok and add the sliced onion. Fry until golden brown.

Step 6

Add the marinated chicken and cook on a high heat for 8 to 10 minutes stirring occasionally.

Step 7


Add a cup of water and let it come to a boil. Next, put the ground masala and give them all a good mix. Cover and let it cook on medium flame for about 20 minutes stirring occasionally.

Step 8

Once the chicken is tender and moisture evaporates and you get desired consistency, it is done.

Step 9

Garnish and enjoy the chicken sukka with any Indian bread of your choice.

Tip

Dry coconut gives an authentic flavour to the chicken sukka

Chicken Vada Pav

Mumbai and it’s passion and love affair with vada pav is well known. This mouth watering snack enjoys immense popularity among the Mumbaikars and my boys are no different and especially the younger one. Recently on his visit to a food joint, he came across the non vegetarian version of this iconic snack called ” chicken vada pav”. Mesmerised by its aroma and flavor, he motivated me to give a try to this unique dish. Chicken keema cooked with regular spices and herbs, stuffed in the potato mix, dipped in gram flour batter and deep fried to perfection and finally sandwiched between the pav — an iconic dish with an iconic twist.Believe me, the explosion of flavours is worth all the hard work.

Ingredients 

For keema

Chicken mince : 200 gms

 Onion : 1

Ginger garlic paste : 1 tsp

Corriander powder : 2 tsp

Red chilli powder : 1 tsp

Turmeric powder : 1 tsp

Cinnamon stick : 1

Black cardamom : 1 

Green cardamom : 1

Lemon juice : 1 tsp

Salt as per taste

Green peas : 2 tsp

For potato mix

Potato : 4 boiled and mashed

Green chili : 4 to 6

Garlic : 6 to 7 pod

Turmeric powder : ½ tsp

Mustard seed : ½ tsp

Curry leaves

Salt

For the batter

Besan : 6 spoon

Ajwain : ½ tsp

Red chilli powder : 1 tsp

Salt as per taste

Oil for frying

Step 1

Take two tsp oil in a pan and add cinnamon, cardamom and cumin seed and let it splutter. Add the chopped onion and fry until golden brown.

Step 2

Add the ginger garlic paste, coriander powder, red chilli powder and salt and saute until the masalas are cooked. Next add the chicken mince and give them all a good mix. Put the peas and saute them all together.cover it with a lid and let it cook for ten to fifteen minutes until the keema is done stirring regularly.

Step 3

Sprinkle coriander leaves and add the lemon juice. Keep it aside and let it cool.

Step 4

In the meantime make a lump free and smooth thick batter with besan, salt, chilli powder and turmeric and water. Let it rest for sometime.

Step 5

In a pan heat 1 tsp oil and fry the green chillies and garlic. Once cool coursley grind it. 

Step 6

In the same pan add two tsp oil and add the mustard seeds and curry leaves and let it splutter and release the aroma. Next add the boiled and mashed potatoes along with turmeric and red chilli powder and salt and stir fry them until done. Let it cool.

Step 7

Grease your palm and make a ball with the potato mix and fill in two tsp keema in the centre and give it a shape like a round shaped vada.

Step 8

Dip the vada in the besan batter and deep fry and enjoy with pav and chutney.

Tip

One may use the soya keema for the veg version.


Prawn Tikka

A few days back while cleaning my cupboard, l  came across an old cookery book lying unnoticed in the shelf. As I started to turn its pages,    I chance upon few breathtaking kebab recipes and prawn tikka instantly caught my attention and decided to give a try. It turned out to be of intense flavour and unparalleled taste. And so here I am with the recipe since I strongly believe that the only way to treat these hidden treasure is to pass it on and circulate to increase its value. The taste and aroma of prawn tikka will definitely knock you off your feet. I have retained the tail of the prawns to make it crunchy from outside and juicy inside.

Ingredients:

Prawns : 1 kg de-veined

First marinade

Lime juice : 2 tsp

Salt : 1 tsp

Second marinade

Hung curd : 1 cup

Garlic paste : 3 tsp

Ginger paste : 4 tsp

Pepper : 1 tsp

Ajwain : 1 tsp

Cream : 6 tsp

Grated cheese : 6 tsp

Garam masala powder : 1 tsp

Besan : 4 tsp ( dry roasted)

Salt : As required

Butter: For brushing

Step 1

img_20191214_093737-12117428033.jpgMarinate the prawns with salt and lemon juice and keep it aside for at least half an hour.

Step 2

img_20191214_1050191795161153.jpgMix the curd with the rest of the ingredients and give it all a good whisk.

Step 3

img_20191214_1054541615445029.jpgSqueeze the extra moisture from the marinated prawns. Now mix it with the second marinade and let it rest for at least an hour.

Step 4

img_20191214_1321001538611277.jpgPierce the prawn through thin bamboo skewers .

Step 5

img_20191214_1322221818605990.jpgPlace the skewers in the griddle pan at a medium heat for about ten minutes brushing wit the rest of the marinade and melted butter.

Step 6

img_20191214_1335382070806466.jpgOnce done serve it with salad of your choice.

Tip

Do not overcook the prawn as it will become tough and chewy.
soak the bamboo skewers in water for at least half an hour before using it.


Murg Mussallam

There are several variations of murg musallam and almost every family has its own take on this traditional whole chicken recipe. For me, murgh musallam means taste of nostalgia since for generations it has been an integral part of our family wedding menu. No wedding reception till this day is complete without our very own murgh musallam. And it was originally cooked by a proficient muslim cook named khudoos and later his son murshid who had an expertise in old mughlai khana. Although they are no more, but luckily my family managed to document the recipe though they were very secretive about the same. Murgh mussallam is a mughlai style whole chicken recipe stuffed with boiled egg and dry fruits and slow cooked in curd and onion based sauce. It is an incredible dish to pamper your family and friends for those special occasions. It takes a little time and patience but believe me it is so rewarding and delicious.

Ingredients

Chicken : 1 whole ( remove all the integral organ from the cavity of the chicken)

Marination

Curd : 1 cup

Ginger paste : 2 tsp

Garlic paste : 1 tsp

Red chilli powder : 2 tsp

Garam masala powder : 1 tsp

Salt : as required

For the stuffing

Hard boiled eggs : 2 (shell removed)

Fried onion : 2

Khoya : 100 gms

Kaju : 10

Kishmish : 10

Green chilli : 5 to 6

Mint leaves 

Coriander leaves

Garam masala powder : 1 tsp

Salt : 1 tsp

Step 1
img_20191116_10044075373533.jpg
Wash the chicken thoroughly from outside and clean the cavity by placing it under running water.

Step 2
img_20191116_100710989910549.jpg
Make deep incision with sharp knife.

Step 3
img_20191116_1010401071898299.jpg
In a bowl whisk together curd, Ginger paste, garlic pastel, garam masala powder, red chilli powder and salt.

Step 4
img_20191116_1013081233266258.jpg
Marinate the whole chicken along with the cavity evenly with the curd mixture. Refrigerate it for at least an hour.

Step 5
img_20191116_1126563453312.jpg
In a separate bowl, mix the fried onion, khoya, dry fruits, mint and coriander leaves, garam masala along with eggs and salt.

Step 6
img_20191116_113356809585510.jpg
Stuff the cavity with the egg mixture.

Step 7
img_20191116_1136082019265119.jpg
Tie the legs of the chicken using a kitchen twine.this will help the stuffing from falling out.

Step 8
img_20191116_122545754498532.jpg
Heat 4 tsp oil in a thick bottom pan.

Step 9
img_20191116_1226171513617168.jpg
Layer the sliced onion over it.

Step 10
img_20191116_123529396146072.jpg
 Top it with the chicken along with the marinade and kashmiri red chilli powder.

Step 11
img_20191116_123110933987723.jpg
First let it cook on high flame for about 5 to 7 minutes.
Flip the chicken gently to the other side.

Step 12
img_20191116_123624316416198.jpg
Lower the flame and cover the lid. Let it cook on medium heat for about 25 minutes and after every 5 minutes make sure to rotate the chicken onto the other side for even cooking.

Step 13
img_20191116_125602759453642.jpg
After half an hour flip chicken and pour the sauce over it and let it cook for another 10 minutes.

Step 14
img_20191116_135752521942207.jpg
Switch off the heat and let the chicken rest in pan for about ten minutes. Now gradually transfer the murgh musallam into the serving dish and pour the rest of the masala over the chicken.

Tip

For a perfect soft and tender chicken try to marinate the chicken a day before the actual cooking.

Custard and Jelly

Custard and jelly is a colourful and classic dessert that is both elegant and comforting at the same time. Anubhav, my first born loves home made sweets. Such was his love for it during his growing up years ,that my fridge would always be loaded with custard and it’s different variations. But now all grown up and off to hostel, I indeed miss those sweet custard days. Since, custard and jelly was a regular affair at my place, I thought of sharing the same with my readers. Because it is made using readymade jelly and custard packets, it is quick and easy to make. It is a double layered dessert recipe with custard at the bottom and jelly on top. Serve it in general or personal portion along with fruits of your choice and enjoy it’s zestful flavour.

Ingredients

Milk : ½ litre

Sugar : 4 tsp

Custard powder : 6 tsp

For jelly

Prepare jelly according to the packet instructions.

Step 1
img_20191013_1137291837191801.jpg
Mix the custard powder in ½ cup of cold milk.

Step 2
img_20191013_1138051177756412.jpg
Boil the rest of the milk along with sugar and let the sugar dissolve completely.

Step 3
img_20191013_113958773573370.jpg
Once done reduce the flame and add the custard mixture whisking it continuously so that no lump is found. Once it reaches its desired consistency, switch off the flame.

Step 4
img_20191013_1142301173495831.jpg
Evenly spread the custard in the serving dish and let it cool down and set .

Step 5
img_20191013_121318533418687.jpg
In a bowl open the jelly packet and mix both the granules together.

Step 6
img_20191013_1214051681205100.jpg
Pour 250 ml of hot water into the jelly granules and stir it until it dissolves.

Step 7
img_20191013_121534386164647.jpg
Pour the jelly over the set custard and let it cool and leave it until it sets over the top of the custard.

Step 8
img_20191013_1312441952600005.jpg
Once done place it back in the fridge. Serve it chill along with fruits of your choice.

Tip

Let the custard be a little thicker than the normal one.

Chicken Keema pockets

Chicken Keema pockets

Being repetitive with the menu makes my son dullish. And so every time at such, I have to come up with a new and innovative recipes to impress him so that he has less complain in life. Here I have tried chicken Keema pockets in  Chinese style. keema, I feel is a very versatile non veg form which can be used in making varieties of delicacy. It is a perfect way to give a meaty twist to a traditional food and elevate it to a fusion level. So lighten your mood with chicken Keema in a small and tasty packets.

Ingredients

For the dough

Maida : ½ kg

Oil : 4 tsp

Salt : 1 tsp

Lukewarm water : as required

Stuffing

Chicken mince : 1/2 kg

Red , yellow and green capsicum : 1 each

Onion : 1

Crushed Ginger and garlic : 2 tsp each

Soya sauce : 1 tsp

Tomato sauce: 1 tsp 

Vinegar : 1 tsp

Schezwan chutney : 2 tsp

Salt : as required 

Oil: for frying

Step 1


img_20190827_123325281138903.jpg

img_20190827_1240231483381591.jpgIn a mixing bowl  add flour, salt, oil and lukewarm water and knead a soft smooth dough.cover it with damp cloth and let it rest for half an hour.

Step 2
img_20190827_1257001107536069.jpg
Cut the capsicum into small cubes.

Step 3
img_20190827_1301081612626578.jpg
Add oil in pan and saute the crushed Ginger and garlic.

Step 4
img_20190827_130220459766741.jpg
Saute onions along with Ginger and garlic until it turns translucent.

Step 5
img_20190827_130253784891509.jpg
Next add the capsicum and let it all cook together. 

Step 6
img_20190827_1304101643368567.jpg
Once it becomes soft add chicken mince along with 1 tsp salt and saute it.


Step 7
img_20190827_130634637234750.jpg
Cover the lid and let it cook for about fifteen minutes or until the Keema becomes tender.

Step 8
img_20190827_1312521203208149.jpg
Open the lid and add all the sauces and stir them all together.

Step 9
img_20190827_1316101947233267.jpg
Take it out and let it cool.

Step 10
img_20190827_1332241386552067.jpg
Take a ball from the dough and flatten it with the help of rolling pin.cut out into squares from it.

Step 11
img_20190827_13335149475145.jpg
Add the prepared stuffing into it.

Step 12
img_20190827_13344730775114.jpg
Fold it carefully and press it lightly to seal the edge with the help of a fork and make a pocket out of it.

Step 13
img_20190827_1342391426998348.jpg
Shallow fry until golden brown and crispy.

Step 14

img_20190827_1352521255413805.jpg

Serve it with sauce of your choice.

Tip

The lukewarm water helps the dough to be soft and the secret behind a perfect outer crust of the pocket is of course a good dough.


Microwave Chocolate Mug Cake

Siddharth is my thirteen years old multi-talented nephew who is more like a son to me.on my visit to his house,this young cooking enthusiast surprised me with a mouth watering chocolate mug cake that was served within ten minutes. Impressed with his cooking skill, I decided to post the same recipe for my blog. It is a perfect dessert recipe that is ready in almost short span of five minutes including the preparation time. The chocolate makes the recipe even more delicious. The chocolate mug cake is indeed one of the easiest dessert recipe and a sweetest treat by a young teenager for his aunt. Indeed a perfect end to any day.

Ingredients

Refined flour or atta : 4 tsp

Powdered sugar : 2 tsp

Cocoa powder : 2 tsp

Baking powder : ¼ tsp

Vegetable oil : 2 tsp

Milk : 4 to 5 tsp

Kit kat : one small strip

Salt : a pinch

Step 1
WhatsApp Image 2019-07-26 at 8.13.36 PM(1)
In a microwaveable mug take all the dry ingredients and mix it well with the help of a fork.

Step 2
WhatsApp Image 2019-07-26 at 8.13.36 PM(8)
Now add oil and milk and give it a good mix. 

Step 3
WhatsApp Image 2019-07-26 at 8.13.36 PM(11)
Adjust the milk for a ribbon consistency batter.Top it with chocolate pieces.

Step 4
WhatsApp Image 2019-07-26 at 8.13.36 PM(13)
Set the microwave at 900 power and place the mug in the oven. Microwave it for 2 minutes.

Step 5
img_20190725_133301205021370.jpg
Your mug cake is ready.

Tip

One can use choco chips and serve it with chocolate syrup for even better taste.

Soya Mughlai Paratha

Paratha is a staple Indian food and especially in Northern part of India, a day is incomplete without their very own paratha.From plain to stuffed, it is enjoyed in any form. Mughlai paratha is a popular Bengali street food and I have tried a veg version of it with soya granules. With 52% protein content, it is indeed a powerhouse recipe for your dear ones. combine it with your favorite chutney and relish the divine flavour of soya keema mughlai paratha.

Ingredients

For the dough

Maida: 250 gms

Oil: 2 tsp

Salt: 1 tsp

For the stuffing

Soya keema: 200 gms

Onion: 2

Green chilli: 6 to 7

Garlic paste: 1 tsp

Coriander powder: 2 tsp

Turmeric powder: 1 tsp

Green peas: 50 gms

Garam masala powder: 1 tsp

Lemon juice: 2 tsp

Kasuri methi: 1 tsp

Salt : as per taste

Oil : for frying

Step 1

img_20190613_1844201007716838.jpg
Step 1: Soya Mughlai Paratha

Soak the soya keema in hot water along with salt. Drain it out after 5 to 7 minutes or until they become soft. Once cool squeeze the extra water from it and keep it aside.

Step 2

img_20190613_1924171963513952.jpg
Step 2 : Soya Mughlai Paratha

Knead maida along with oil and salt. Cover it with a damp cloth and let it rest for at least half an hour.

Step 3

img_20190613_1840281704696530.jpg
Step 3: Soya Mughlai Paratha

Add onion in a hot oil and Fry them until done. Add the rest of the masala and saute it until the oil leaves the side of the pan.

Step 4

img_20190613_1841321688718795.jpg
Step 4 : Soya Mughlai Paratha


Now put the peas and saute it along with the masala.


img_20190613_184524138770532.jpg
Step 5 : Soya Mughlai Paratha


Once the peas is coated with the masala add soya granules and let them cook together.

Step 6

img_20190613_185040728754516.jpg
Step 6 : Soya Mughlai Paratha


Once done sprinkle kasuri methi along with coriander leaf and lemon juice. Keep it aside and let it come to room temperature.

Step 7

img_20190613_1938301618474704.jpg
Step 7 : Soya Mughlai Paratha

Roll the dough into a thin rectangular sheet.

Step 8

img_20190613_193914836783657.jpg
Step 8 : Soya Mughlai Paratha

Place the filling in the centre of the sheet.


Step 9

img_20190613_193944990455054.jpg
Step 9:Soya mughlai paratha


Now fold the four sides of the sheet inward, starting with the longer side forming an envelope shape. Now press down gently and seal the sides.

Step 10

img_20190613_1942122124996967.jpg
Step 10 : Soya Mughlai Paratha

Heat oil in a frying pan and shallow Fry until golden brown and crispy.

Final Step

img_20190613_195647-11766710746.jpg
Food Ready : Soya Mughlai Paratha

Enjoy the soya mughlai paratha with chutney.

Tip

One can replace the soya keema with any other vegetable of your choice.

Cinnamon Flavoured Mutton (दालचीनी गोश्त )

                                                                Eid Mubarak !!!
One may have tasted the best of the cuisine that the world has to offer but there is always one such recipe that remains close to your heart and that could give a run for money to all such classy cuisine. I am indeed blessed to have a good hearted chachi who has introduced me to world of such lost recipes that has been there for ages and passed on from generation to generation. Dalchini gosht is my aunt’s secret recipe that has been handed down to her by her mother. It is a very classic recipe and am trying to gather and document such great family recipe. It is a subtle flavoured mutton preparation infused with warm Cinnamon fragrance.

Ingredients:

Mutton : 1 kg

Onion : ½ kg cut into roundles

Shah jeera : ½ tsp

Whole coriander : ¼  tsp

Clove : 4 to 5

Green cardamom : 2 to 3

Bay leaf : 4 to 5

Garlic : 8 to 10 split

Ginger : 4 tsp grated

Kashmiri whole chilli : 10

Cinnamon stick : 1 ½ inch

Oil : 1tsp

Ghee : 4 tsp

Curd : 4 tsp

Sugar : a pinch

Salt : as per taste

Step 1
img_20190602_111957291346584.jpg
Marinate mutton with shah jeera, onion, ginger, slit garlic , clove,green cardamom, bay leaf along with salt and oil. Keep it aside and let it marinate it for at least an hour.

Step 2
img_20190602_1102311589078471.jpg
Deseed the red chilli and soak it for about ten minutes.Grind the red chilli along with Cinnamon stick into a smooth paste.

Step 3
img_20190602_1236571104326425.jpg
Add 4 tsp of curd in the chilli mixture and whisk it all together.

Step 4
img_20190602_114436128409100.jpg
Take a thick bottom pan and put the ghee in it. Add a pinch of sugar and let it caramelise.

Step 5
img_20190602_1146031290732119.jpg
Now add the mutton with the marinade and Fry it on high flame for about four to five minutes .

Step 6
img_20190602_1150071580169617.jpg
Add the water such that it reaches the level of the mutton or until the mutton pieces gets soaked. Once boiled lower the flame and cover it and let it Cook.

Step 7
img_20190602_130042308694321.jpg
When ¾ done open the lid and add the curd, chilli and dalchini mixture . Cover it and let it Cook until it is done and the masala and the mutton comes together and becomes soft and tender.

Step 7
img_20190602_1353471828788549.jpg
Serve it on a bed of rice or  with any Indian bread of your choice.

Tip

Use Kashmiri red chilli for a perfect red colour.

Mango Dessert (आम की खीर )

The great Indian summer is here and indeed a perfect time to enjoy the king of fruit —- mango. One cannot stop drooling over the delicious and juicy fruit as it is the best part of summer inspite of the scorching heat. This bright yellow fruit has made fan of all ages as it not only tastes good but is also loaded with health benefits. I have been enjoying the mango kheer since childhood and now so does my children. It is a very unusual yet delicious kheer with the goodness of sweetened and thickened milk along with juicy mango.

Ingredients

Full cream milk : 2 litre

Mango : 2

Sugar as per taste

Vanilla essence : 1 tsp

Dry fruit for garnish

Step 1
img_20190416_1156502018359942.jpg
Boil the milk in a thick bottom pan.

Step 2
img_20190416_1243111759599021.jpg
Let the milk cook on a medium high flame stirring continuously until the milk reduces almost half to its original volume.

Step 3
img_20190416_1320441790144829.jpg
Add the sugar and let it get dissolved.

Step 4
img_20190416_13312970740235.jpg
Once done take it out in a bowl. Once it comes down to the room temperature add the vanilla essence and let it cool further.

Step 5
img_20190416_1336291299325852.jpg
Cut one mango into small cubes and make pulp out of the second one.

Step 6
img_20190416_1338031570926926.jpg
Now mix the mango with the reduced milk and put it in the fridge.

Step 7
img_20190416_1344122111607585.jpg
Enjoy the chilled mango Kheer.

Tip

Do not ever add the mango in the hot milk as the milk will curdle.

Add the sugar accordingly since mango has its own sweetness.