Dhuska (Rice and Lentil Pancake )


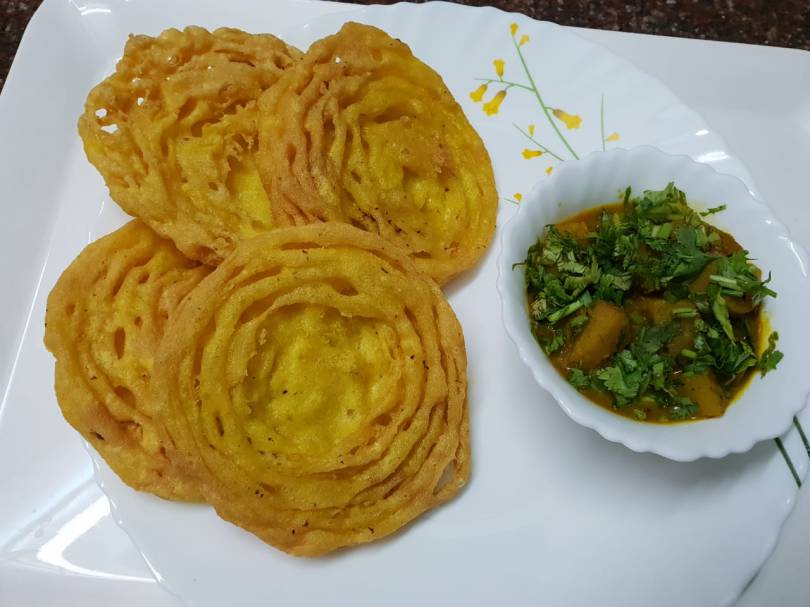
Dhuska is a very popular deep fried festive snack eaten all over Jharkhand region in the eastern zone of India. This is my aunt in law’s (Mami) recipe and I am truly grateful to her for sharing this treasure with my blog readers. Dhuska is made by soaking rice and lentil and then grinding it together into a smooth paste.It is then deep fried in Mustard oil. There are many versions of Dhuska but the shape and texture of this one makes it distinct from the rest of the recipe. Dhuska is normally enjoyed as an evening snack or even full meal along with spicy chicken or mutton curry and Aloo dum.

Ingredients :

dhuska11

Basmati rice :1 cup

Chana dal :1 cup

Turmeric powder :½ Tsp

Salt as per taste

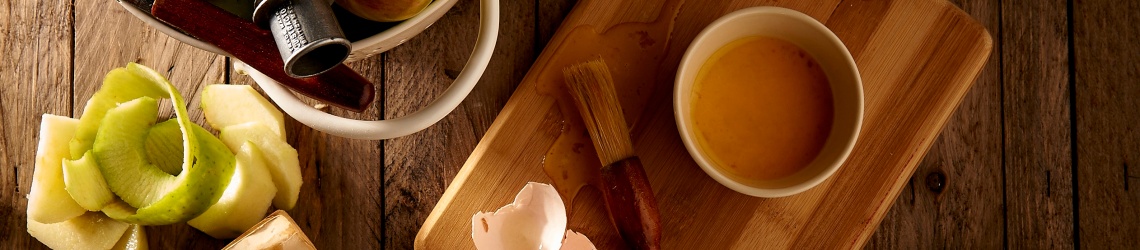
Mustard oil for frying

Step 1

dhuska12

Soak rice and chana dal overnight.

Step 2

dhuska10

Grind it into a fine paste

Step 3

dhuska9

Batter should be in pouring consistency.

Step 4:

dhuska8

Add salt and turmeric powder into the batter

Step 5

dhuska5


Put oil in a kadahi . Let the oil reach the smoking point.

Step 6

img_20181216_1106551111296909.jpg


Pour the batter slowly in the center of the oil with the help of a steel glass so as to ring is formed.

Step 7

dhuska3

Fry it turning on both the sides till it turns crispy and golden brown

Step 8

dhuska2

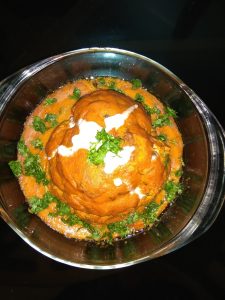
Take it out in an absorbent paper. Dhuska is ready. Serve it hot with any spicy gravy dish of your choice.


Tip:

Try to fry Dhuska in Mustard oil as it’s pungency gives it the traditional flavor.

Gobi Mussalam

Gobi Mussallam

Gobi Musallam ( Baked Whole Cauliflower in creamy sauce )

Cauliflower or Gobi is a very popular north Indian vegetable and is often combined with other veggies to get a perfect curry. Here I have tried to give this humble veggie a little gourmet treatment by cooking it in a Mussallam style. The cauliflower head is blanched, fried and drenched in the creamy makhni style gravy. It is a great party fare relished by family and friend. I am sure that the Gobi mussallam recipe will win hearts of even the most fussy eaters around. Do try it yourself to experience it’s exotic flavour and distinctive combinations of flavours .

Ingredients:

Gobi: 1 Whole Gobi

Onion: 1 large

Tomatoes :3

Garlic :7 to 8 clove

Kaju : 25 Grams

Raisin: 8 to 10

Red chilli powder :2 tsp

Turmeric :1 Tsp

Salt as per taste

Kasauri methi: 1 Tsp

Cream :2 tsp

Oil as per requirement.

Step by step recipe:

Step 1:

Blanch the cauliflower along with a pinch of turmeric and salt

Step 2:

Take it out and put it in the strainer till the extra water dries up .

Step 3:

Add oil in the pan and gently place the cauliflower head and fry it lightly till the colour changes.

Step 4:

Now gently place in the baking dish

Step 5:

Place another pan on the flame. Add a cup of water and put the sliced onion, tomatoes, garlic,cashew nuts and rasins and let it boil till the onion becomes soft.Once done strain out the extra water and grind it all together into a smooth paste

Step 6:

Heat oil in the pan. Add the grinded masala along with a pinch of haldi, red chilli powder and salt and saute it till the masala is done. Now add kasauri methi along with cream and switch off the flame

Step 7:

Pour the gravy over the fried cauliflower. You can keep the consistency of the gravy as per your requirement.

Step 8:

Preheat the oven at 180 degree Celsius and bake the gobi mussallam for almost,30 minutes or until the cauliflower is done. Garnish it with cream and coriander.

Tip:

One can keep the texture creamy by adding half a cup of milk in the in a makhni gravy.

Keema Kulcha ( Mutton Mince Stuffed Flat Bread)

Keema Kulcha ( Mutton Mince Stuffed Flat Bread)


Kulcha is a type of leavened flavoured flat bread that originated in the Indian subcontinent. Keema kulcha is a mutton mince stuffed flat bread and indeed an ultimate comfort food for all the meat lovers. It is truly a perfect menu for those lazy days when one is not in a mood to go for an elaborate lay out. Keema kulcha is loaded with flavoursome minced meat and is served both as a breakfast or main meal dish along with yoghurt and salad.Traditionally kulcha is cooked in tandoor but since it is a home style cooking, I have made it on pan as well as air fryer for my blog readers. Enjoy my take on the Keema kulcha straight from the pan.

Ingredients: For the stuffing

  1. Mutton Keema:  ½ kg
  2. Onion:  1 diced
  3. Ginger paste: 1tsp
  4. Garlic paste :1 Tsp
  5. Pepper powder: 1 Tsp
  6. Cummin powder: 1tsp
  7. Coriander powder: 1 Tsp
  8. Turmeric powder: ½ Tsp
  9. Red chilli powder: 1tsp
  10. Garam masala powder: 1 Tsp
  11. Oil: 3 Tsp 

Ingredients: For the dough

  1. Maida: ½ kg
  2. Milk: 2 tsp
  3. Curd: 2 tsp
  4. Baking powder: 1 Tsp
  5. Oil: 2 tsp
  6. Salt: as per taste
  7. Water: as required

Ingredients: For garnish

  1. Chopped corriander leaves
  2. Butter

Step 1:

Sieve the flour along with baking powder. Add salt, milk,curd, oil along with water to knead a soft dough. Cover it with a damp cloth and keep it aside for atleast half an hour.


Step 2 :

img_20181028_1126391144647784.jpg

Heat oil in a kadahi. Add onion and fry it till it turns golden brown. Next add the masala and saute it till they all come together. Sprinkle few drops of water in order to prevent them from burning.

Step 3:

img_20181028_1132162130286628.jpg

Add the Keema and cook them all together.

Step 4:

img_20181028_1147261604226274.jpg

Once done transfer the Keema into another bowl and sprinkle the lemon juice along with the coriander leaves over the top.

Step 5:

img_20181028_125501332900381.jpg

Divide the dough into small portion and stuff it with the Keema filling. Now gently roll out these stuffed balls .

Step 6:

img_20181028_1925391926902656.jpg

Transfer the kulcha into a pre heated air fryer and let it cook for 5 to 7 minutes or until the kulcha turns golden brown. Brush it with butter and serve it hot.


Step 7:

img_20181028_1257371531479837.jpg

In case one doesn’t have airfryer, one can easily make it on a  hot tawa till the kulcha gets the desired colour.


Step 8:

img_20181028_1920381887611673.jpg

img_20181028_130429944704014.jpg

Transfer it to a serving platter and relish it with curd and onion rings.

Tip:

The mutton Keema can be replaced with chicken paneer, potato or vegetable

Potato PinWheel ( Aloo Nimki)

Nimki is a light refreshing nibbles that is highly popular in Bihar. Since the dough is the same as nimki but is stuffed with potato, we call it aloo nimki. Aloo nimki is a new spin to the traditional Indian samosa. In fact when I get bored of making samosas, aloo nimki pops up in the menu as it is perfect for anyone’s taste. It is a mouth-watering snack where the potato stuffing is rolled in a maida dough and shaped like a pinwheel. The kids in particular relish it more because of its crisp texture and interesting shape . It is enjoyed best with red or green chutney.

Ingredients :

For Stuffing

  1. Potato :  5 Nos.
  2. Onion :  1 small thinly diced
  3. Ginger paste:  1 tsp
  4. Coriander powder:  1 tsp
  5. Turmeric powder :  ½ tsp
  6. Red chilli powder:  1 tsp
  7. Garam masala powder:  1 tsp
  8. Aamchur powder:  1 tsp
  9. Oil: For deep frying
  10. Salt: As per taste

For the dough

  1. Maida: 300 GM’s
  2. Oil: 3 tsp
  3. Salt: 1 tsp
  4. Ajwain:  ½ tsp

Step by step instructions with photos

Step 1:

1.potato pinwheel.jpg

Boil potatoes and peel them.


Step 2:

img_20181016_1214531206737279.jpg

Mash them coarsely


Step 3:

img_20181016_1223061056190955.jpg

Add oil into kadai . Once hot put the diced onion and saute it till the color changes. Add Ginger along with the rest of the masala .


Step 4:

img_20181016_122529781399964.jpg

Saute the masala and then add the mashed potatoes.


Step 5:

img_20181016_122741383249986.jpg

Saute it on high flame for couple of minutes till the potatoes and the masala blends together. Switch off the flame and sprinkle chopped coriander leaves over the mixture.


Step 6:

img_20181016_1228501348826948.jpg

Spread the stuffing in a flat dish and let it be cool.


Step 7:

img_20181016_124220179602173.jpg

In a shallow vessel knead  a tight dough along with salt, oil and Ajwain.


Step 8:

img_20181016_1246011079958057.jpg

Cover the dough and let it rest for at least ten minutes.


Step 9:

img_20181016_124832747160180.jpg

Divide the dough into equal size balls. Flat the balls using the rolling pins and make large rotis. Use oil so that that the dough doesn’t stick to the rolling pin.


Step 10:

img_20181016_1251021062497665.jpg

Divide the stuffing into equal parts. Now spread the potato mixture evenly over the roti.


Step 10:

img_20181016_1251541569787698.jpg

Now place the another disc over the stuffing and repeat the process of evenly spreading of the mixture


Step 11:

img_20181016_12540373040247.jpg

Gently roll the disc starting from one end.  


Step 12:

img_20181016_125454413459918.jpg

Once done with rolling keep it aside.


Step 13:

img_20181016_125617477987926.jpg

Take a sharp knife and cut the roll horizontally. 


Step 14:

img_20181016_1258401963378742.jpg

Each slice will be in a shape of a pinwheel.


Step 15:

img_20181016_1303311091311248.jpg

Heat oil in a pan and deep fry the nimki on medium flame turning occasionally .


Serving

img_20181016_1317011449515341.jpg

Take them out in an absorbent paper once it is golden and crisp. Serve it hot with chutney or sauce of your choice

=============

Tip:

Try to prepare the stuffing in advance and allow them to come to the room temperature. This will enable the pinwheel to retain its shape.

Kaali Mirch Gosht

Kaali Mirch Gosht ( Black Pepper Mutton)

“ Nothing is better than going home to family and eating good food”.

The Kaali mirch ghosht or black pepper mutton is one such comfort food that is loved and relished by family and friend alike.This is for the first time that I am sharing a mutton recipe with my blog reader and what better way to start than with a legendary family recipie like Kali mirch gosht. It is a very simple yet classic recipe of mutton  with curd and handful of regular spices. The pungency and goodness of freshly ground black pepper elevates the flavour of the mutton. It is indeed pepper that makes all the difference and gives this curry a distinct flavour. Kaali mirch gosht is enjoyed especially during winters as it not only adds heat to the dish but also warms the body.This fiery mutton curry is a culinary treat for all spice lovers. It pairs beautifully with paratha,roti and even plain rice.

Ingredients :

  • Mutton : 750gms
  • Onion :    5  –  (3 cut into rings  & 2 roughly sliced)
  • Curd :   250gms (beaten)
  • Freshly crushed black pepper :. 4 to 6 Tsp
  • Ginger :  2tsp grated
  • Turmeric powder :  A pinch
  • Oil :  4 tsp
  • Ghee : 1 Tsp
  • Salt : As per taste

Follow the pictorial step by step recipe for a perfect result

Step 1:

!_Kali Mirch Murg

Wash mutton pieces well and keep it aside. Add oil in the cooker and put in the grated ginger.saute it for couple of seconds.


Step 2:

2_Kali Mirch Gosht

Put the mutton piece along with salt and onion into the pan.


Step 3:

3_kali Mirch Gosht

Saute it till it changes its colour.


Step 4:

4_kali Mirch Gosht

Cover the cooker with its lid and let it pressure cook for one whistle and then lower the flame for about 5 minutes. Kindly note that I have not added water into it as the mutton and onion will leave its own juice.

Step 5:

5_kali Mirch Gosht

Take out the whistle and remove the lid. Now add  curd and turmeric and let it cook on low flame for about 5 minutes or until the curd mixes perfectly with the mutton.


Step 6:

img_20181004_121733728843202.jpg

Add the freshly crushed black pepper.


Step 7:

7_kali Mirch Gosht (1)

Give it all a good mix.


Step 8:

8_kali Mirch Gosht

Cover the lid and let it cook for 10 minutes on a low flame.


Step 9:

9_kali Mirch Gosht

Add the onion rings.


Step 10:

10_kali Mirch Gosht

Let it cook on low flame until the mutton infuses all the aroma and flavour of the pepper.


Step 11:

11_kali Mirch Gosht

Let the mutton cook in its own juice till the onion becomes soft and it reaches the desired consistency


Step 12:

12_kali Mirch Gosht

Sprinkle a Tsp of desi ghee and the fiery Kali mirch ghosht is ready to be served

Tip:

One can vary the ratio of the pepper corn to suit your taste.


Italy in a pocket (Paneer Tikka stuffed with plum and Italian herbs)

Paneer Tikka stuffed with plum and Italian herbs

Paneer Tikka is one of the most amazing delicacy in the Indian vegetarian platter. I personally enjoy paneer tikka and thought of combining two of my favourite cuisine —– Indian and Italian to create something new and innovative. And the result was a joyful fusion of vibrant red— coloured paneer tikka stuffed with Italian green basil, olive, oregano, cheese along with plum. Once these flavour amalgamates with each other, it results in fusion food that combines the best elements of different culinary traditions. Italians like lndians prefer to use fresh and flavourful ingredients that elevates the taste of the food. Since I have personally tried it, I assure my blog readers that the aroma and flavour of paneer tikka stuffed with plum and Italian herbs will definitely bring joy to your family and friend. Feel free to make your own choice of stuffing that suits your palate.


Ingredients

  • Paneer(cottage cheese)  250 gms
  • Hung curd 150 gms
  • Ginger paste 1tsp
  • Garlic paste 1tsp
  • Red chilli powder 1tsp
  • Kasauri methi 1tsp
  • Turmeric powder a pinch
  • Kashmiri red chilli powder 2 tsp
  • Salt as per taste
  • Oil 2 tsp
  • Chaat masala 1 Tsp
  • Garam masala powder ¼ Tsp
  • For the stuffing
  • Plum ½ thinly diced
  • Cheese 4 tsp grated
  • Olive 2 diced
  • Chilli flakes 1 Tsp
  • Oregano ½ Tsp
  • Basil leaves 3 to 4


Step 1:

Cut paneer into cubes with 2 inch thickness.slit it horizontally almost making it like a pocket so that it ca be stuffed to perfection.

1_Italy_in_Pocket


Step 2

Combine together plum,olive,basil,cheese,oregano along with chilli flakes.

2_Italy_in_Pocket


Step 3

Place the Italian flavoured mixture in the slit or pocket of the paneer slice. Keep it aside.

3_Italy_in_pocket


Step 4

In a separate bowl whisk together  hung curd along with oil and rest of the masala.

4_Italy_in_Pocket


Step 5

coat the stuffed paneer cubes with the marinade. Keep it aside and let it marinate for at least an hour.

5_Italy_in_pocket


Step 6

Preheat the airfryer at 200 degree Celsius. Arrange the paneer cubes and brush it with oil or butter


6_Italy_in_pocket


Step 7

Air fry for almost 10 to 12 minutes or till done.

7_Italy_in_pocket


Step 8

Serve it with chutney or sauce of your choice

8_Italy_inPocket


Tip :

Use firm paneer and not crumbly for the perfect paneer pocket

chicken with cashew and almond

Kaju Badam Murg (Chicken with Cashew and Almond)

Chicken with cashew and almond is a delightful recipe that is rich, creamy, spicy, nutty and tangy . Kaju Badam murg is a wholesome dish with the goodness of protein in chicken as well as host of health benefiting properties of dry fruits. If these dry fruits are included in our diet, it not only enhances the taste but also adds nutritional value to the food. As the name itself signifies, the kaju Badam murg is cooked with coarsely grinded  almond and cashew nut along with curd and few spices. It’s rich and creamy texture makes it a perfect dish to impress your family and friend. Chicken with cashew and almond is easy to cook and is served best with Indian bread of all kind like naan, lachcha paratha or roti.

Ingredient

  • Chicken   1 kg
  • Onion 3 thinly sliced
  • Ginger paste 1 tsp
  • Garlic paste 1 Tsp
  • Cashew nut ¾ cup
  • Almonds 12 to 14
  • Curd ½ cup
  • Red chilli powder 2 tsp
  • Salt as per taste
  • Oil 4 tsp
  • Whole garam masala
  • Cinnamon stick 1
  • Peppercorn 5 to 6
  • Green cardamom 2
  • Black cardamom 1

    Pictorial step by step recipe of kaju Badam murg

Kaju Badam Murg_1

Step 1: Thinly slice the onion.


Kaju Badam Murg_2

Step 2: Deep fry the onion slice till it turns golden brown


Kaju Badam Murg_3

Step 3: Once done take it out in an absorbent paper and keep it aside


kbj4

Step 4: Soak the cashew nuts and almond for about half an hour.later put the dry fruit mixture in a blender


kbj5

Step 5; Coarsely grind it without adding water into it.Do not make a smooth paste out of it


kbj6

Step 6: Marinate the chicken with fried onion,ginger garlic paste,coarsely grinned  cashew and almonds, red chilli powder and salt


kbj7

Step 7Mix it all together and keep it aside for at least half an hour .


kbj8

step 8 Take a pan and put oil into it. Once the oil gets heated add the whole garam masala into it.

kbj9

step 9: Once the masala crackles add the chicken along with the marinade into it. Let it cook on high flame for about 5 to 7 minutes


kbj10

Step 10 :Lower the flame and cover the pan . Cook it for almost half an hour or until the chicken becomes soft and tender. Stir the chicken regularly so that the masala does not stick to the pan


img_20180901_0953451327472148.jpg

Step 11: Dish out the chicken in the serving platter and relish the kaju Badam chicken with roti or paratha.

Tip: Add half cup of milk along with 2 tsp of kasuri methi for velvety texture and richness.


Dahi Kebab ( Hung Curd Kebab)

Dahi kebab is a very classic, healthy and protein rich Awadhi recipe that is made from hung curd along with few spices and seasoned with fresh herbs. In-fact when I first heard about dahi kebab, it was unimaginable for me to even think of a kebab made out of curd since it it so difficult to hold it together . But once I came to know the secret behind it I enjoyed making it myself. Curd or dahi is highly popular throughout south Asian countries like Pakistan,Bangladesh and India. But I believe that we Indians have a special love for dahi and we could have it any form. It is indeed an integral part of our culinary culture.
Dahi kebab is one such curd dish which could be served both as an appetizer and main course. It is crispy from outside and creamy and melting from inside with soft and subtle flavour of spices. There are different variations of making dahi kebab. Enjoy my take on this classic recipe.

Ingredients:

  • Curd : 700 gm
  • Ginger :1 Tsp grated
  • Green chilli : 3 finely sliced
  • Capsicum : 1 finely chopped
  • Cheese :100 gm grated
  • Sugar:  1 Tsp
  • Garam masala  powder :1 Tsp
  • Salt : as per taste
  • Bread crumbs:
  • Besan :4 tsp  ( Dry Roast besan in low flame till it becomes golden brown and aromatic)

    Follow the steps for the perfect result:

Step 1: Tie the fresh curd in a muslin cloth

Dahi-kebab_nandini_1


Step2: Hang it overnight so that the water completely drains out.

Dahi-Kebab_Nandini_2


Step 3: Your hung curd with creamy consistency is done

Dahi-Kebab_Nandini_3


Step 4: Mix the curd with green chillies, capsicum, Ginger, sugar, cheese,roasted gram flour, finely chopped coriander leaves, garam masala powder and salt. Be a little cautious while putting salt since cheese already has salt in it.

Dahi-Kebab-Nandini_4


Step 5 : Mix it all together and put it into the fridge till you proceed.

Dahi-Kebab-Nandini_5


Step 6 : Now apply water or oil in your palm and make tikkis out of the curd mixture. Since the texture of the mixture is very soft and creamy, one needs to delicately handle it.

Dahi-Kebab-Nandini_6


Step 7 : Next coat the kebab with the bread crumbs.

Dahi-Kebab-Nandini_7


Step 8 : Heat oil in the pan and shallow fry the kebab one by one on medium flame. Turn over the dahi kebabs once you get a nice golden crust on the top.

Dahi-Kebab-Nandini_8


Step 9  : Your dahi kebab is ready to be served. Enjoy the appetizing dahi kebab with any chutney or sauce of your choice.

Dahi_Kebab-Nandini_10


Tip: Sugar enhances the tangy flavour of dahi kebab with a pinch of sweetness.


Mutton Kofta Curry

Mutton Keema Kofta Curry

The mutton kofta curry is one such recipe that is very close to my heart as it takes me down the nostalgic memory lane of my childhood. My mother makes one of the most amazing Keema kofta curry. It is in indeed one of the favourite indulgent recipe of my son and every time I  cook this recipe for my loved ones, l could experience the intense and exotic aroma in my entire household.lts all about my mom’s spice and secret that blends so well to create a fabulous dish like this mutton kofta curry. Mutton kofta curry is cooked using raw mutton keema and handful of spices that is easily available in every household . The meatball here is not deep fried but it is poached and cooked in the gravy.This cooking techniques gives a new dimension to the taste of the curry. One just needs to be a little extra careful with the koftas as it could disintegrate if not handled properly .The flavourful mutton kofta curry is served best with plain rice or any variety of Indian bread.

Ingredients :

  • Mutton mince (Keema)  ½ kg
  • Ginger 1 inch
  • Green chilli  2 to 3
  • Egg 1
  • Garam masala powder 1 Tsp
  • Coriander leaves as per taste
  • Pudina leaves optional
  • Soaked bread optional( to be used in case Keema appears too difficult to handle)
  • Ingredients for the gravy
  • Onion 2 large finely chopped
  • Tomato 2 grated
  • Garlic paste 1 Tsp
  • Ginger paste 2 Tsp
  • Turmeric powder 1 Tsp
  • Red chilli powder 2 tsp
  • Coriander powder 2 tsp
  • Whole black pepper 5 to 6
  • Black cardamom 1
  • Green cardamom 2
  • Dalchini 1 stick
  • Whole jeera 1 Tsp
  • Oil 4 Tsp
  • Salt as per tasteFollow the steps by step instructions for  perfect result:

Step 1 : Take a grinder jar and put raw Keema, Ginger,green chilli, green coriander, pudina, egg and a tsp of oil along with salt. Blend it all till it  comes together. Egg will help to bind the koftas. Once done squeeze the water away.Keema Kofta Cuury_011

Step 2 : Apply oil in hand and make small round ball shaped meatballs. Refrigerate them for an hour so that the koftas become firm.Keema Kofta Curry_02

Step 3 : Put oil in the pan and add the whole masala. Fry it till it crackles.Keema Kofta Curry_03

Step 4 : Add the finely chopped onion and fry it till it turns golden brownKeema Kofta Curry_4

Step 5Next add grated tomato, Ginger garlic paste, coriander powder,turmeric powder, red chilli powder and salt.stir it until the oil separates from the masala.Keema Kofta Curry_05

Step 6 : Add water as per your requirement and let it come to boil . Now place the kofta one by one into the boiling mixture. Do not stir or mix the koftas as it could disintegrate. Let it cook on a high flame for at least ten minutes. After that cover the lid and lower the flame and

let it cook in the gravy till the kofta becomes firm.Keema Kofta Curry_06

Step 7 : Check it out after almost twenty minutes to see if the masala and meatballs are done. Stir it carefully.Keema Kofta Curry_07

Step 8 : set the koftas aside in a serving dish.garnish it with cream and the tantalizing mutton kofta curry is ready to be relished with rice or any Indian bread of your choice.Keema Kofta Curry_08


Tip. Add one Tsp of oil in the mince while blending. This will keep the koftas moist and soft